


Introduction
Jump to...
- Why onboard clients on QuickBooks?
- QuickBooks' features
- How to onboard clients on QuickBooks
- Why use Scribe to onboard clients on QuickBooks?
- Personalizing your QuickBooks onboarding process
- Best practices for onboarding clients on QuickBooks
- Quickbooks FAQ
QuickBooks is a powerful accounting software you can use to streamline your business operations and help you manage your finances effectively. If you're new to QuickBooks or want to onboard clients onto the platform, this playbook will walk you through the process.
Playbook: Onboard clients on QuickBooks
- Onboarding clients onto QuickBooks requires a well-designed process to ensure a smooth transition and successful client relationships.
- QuickBooks offers a wide range of features, including chart of accounts, journal entries, invoices and payments, bank reconciliation, reports, taxes, payroll, collaboration tools, and security and compliance.
- Personalizing the onboarding process for each client builds trust, increases client satisfaction, and sets clients up for success with QuickBooks.
- Follow the step-by-step guide to set up and onboard clients on QuickBooks.
Why onboard clients on QuickBooks?
When it comes to managing your business finances, QuickBooks is one of the most popular tools available. Its wide range of features and capabilities can streamline your accounting processes and help you stay on top of your financial health.
However, implementing QuickBooks into your business operations requires more than just installing the software. A well-designed onboarding process ensures a smooth transition and sets up successful client relationships.
💡 Six Key Tips to Simplify Accounting for Your Small Business
What are some of QuickBooks' features?
QuickBooks offers a number of features to help you manage your business more efficiently and effectively.
- Chart of accounts: Create a custom chart of accounts for each client, tailored to their specific business needs.
- Journal entries: Create and edit journal entries to record financial transactions that don't fit neatly into other categories.
- Invoices and payments: Create and send invoices to clients, and track payments received.
- Bank reconciliation: Reconcile bank accounts to confirm that QuickBooks transactions match bank statements.
- Reports: Generate reports like income statements, balance sheets and cash flow statements to track your client's financial performance and help them make informed business decisions.
- Taxes: Prepare and file your client's taxes.
- Payroll: Manage your client's payroll, including calculating paychecks, filing payroll taxes and generating payroll reports.
- Collaboration tools: Collaborate with your clients in real time. This can be helpful for tasks such as reviewing financial data, approving invoices and preparing taxes.
- Security and compliance: QuickBooks offers a variety of security features to protect your client's data. It also complies with industry regulations, such as PCI DSS and HIPAA.
{{banner-onboarding="/banner-ads"}}
How to onboard clients on QuickBooks
Now that you understand the features and benefits of onboarding clients to QuickBooks, let's dive into the step-by-step process for getting started.
Step 1: Set up your QuickBooks account and download Scribe
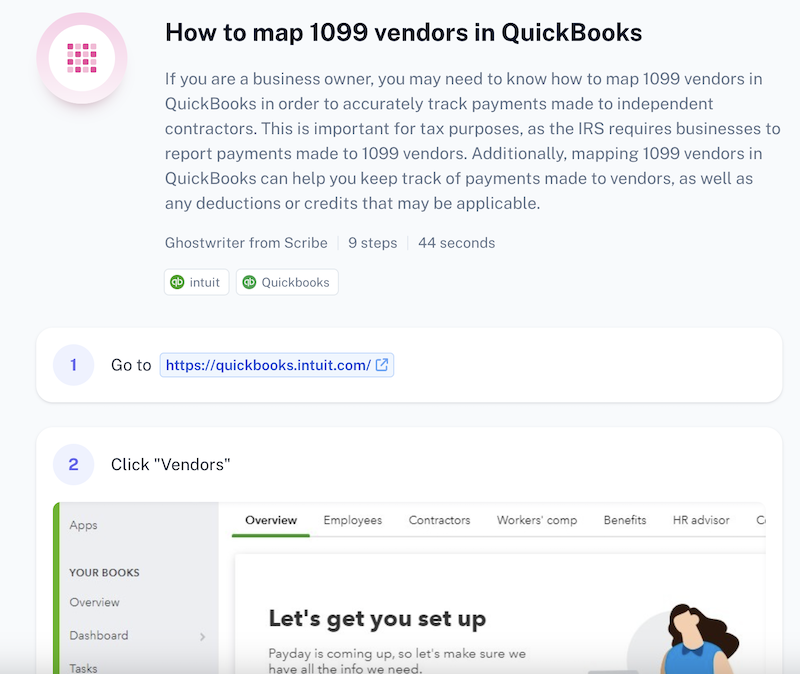
Before you can onboard clients, you need to have a QuickBooks account. If you don't have one already, visit the QuickBooks website and sign up for an account. Choose the plan that best suits your needs and budget.
Then download Scribe, a free AI-powered tool that documents your processes for you, so you can create and embed accounting documents and onboarding guides for your clients. Here's how to get started. ➜
 |
Step 2: Familiarize yourself with QuickBooks features
Take some time to explore the various features and functionalities of QuickBooks. Familiarize yourself with the dashboard, invoicing tools, expense tracking, and reporting capabilities. This will help you better understand how to onboard clients and use the software efficiently.
💡 See how AI tools for accountants can help you improve your accounting practice.
Step 3: Gather client information
To onboard clients onto QuickBooks, you'll need their financial information. Collect details such as their business name, address, contact information, tax identification number, and any existing financial records. This information will be crucial for setting up their accounts accurately.
Step 4: Understand your client's needs
In order to personalize the onboarding process, you need to understand each client's specific needs.
- Conduct a thorough business assessment, including industry, size and current financial processes.
- Gain a deep understanding of each client's unique requirements.
- Tailor the onboarding process to address their specific pain points.
Step 5: Customize your QuickBooks setup
Once you clearly understand the client's needs, you can customize your QuickBooks setup accordingly.
To customize your QuickBooks setup, go to the Settings menu and select the Account and Settings tab. From here, you can access all the different settings you can customize.
- Set up your chart of accounts: You can customize your chart of accounts to include any accounts that you need to track, such as accounts for different types of income, expenses, assets, and liabilities.
- Set up custom fields: Custom fields allow you to track additional information about your transactions, such as project codes, customer types or product categories. You can create custom fields for any type of transaction, including invoices, sales receipts, bills, and checks.
- Set up custom reports: QuickBooks offers a variety of standard reports, but you can also create custom reports to meet the specific needs of your business.
- Set up preferences: QuickBooks offers a variety of preferences that you can customize to control how the software works. For example, you can set up preferences to control how invoices are printed, how payments are processed and how reports are generated.
Step 6: Import client data
If your clients already have financial data in another accounting software or spreadsheet, you can import it into QuickBooks.
- Log in to your QuickBooks account.
- Navigate to the "Clients" or "Customers" tab.
- Use the import feature to transfer data such as customer lists, vendor information and chart of accounts.
Step 7: Add new client accounts
If you need to add new client accounts, there are two ways to add them:
Add a client who doesn't use QuickBooks:
- Go to the Clients menu.
- Select "Add client".
- Select Business or Individual.
- Enter your client's information.
- In the Products section, select "No subscription".
- When you're done, select "Save".
Add a client who already has QuickBooks:
- Ask your client to send you an invitation to become their accountant.
- Open the invitation email and select the Accept Invitation link.
- Sign in with your user ID and password.
- If you have multiple QuickBooks Online Accounting firms, select the one you want to connect your client to.
When adding a client in QuickBooks, you'll need to enter:
- Name.
- Email address.
- Phone number.
- Address.
- Tax ID number
- Industry.
- Products or services they offer.
- Billing information.
- Any additional information like their website address, contact person and notes.
Step 8: Customize client settings
Each client may have specific requirements and preferences, so you can customize their settings accordingly to align QuickBooks with their business needs.
- Go to the "Clients" menu and select the client whose settings you want to customize.
- Click the "Edit" button.
- In the Client Details window, you can customize the following settings:
- Company information.
- Contact person.
- Billing information.
- Job tracking: The client's job number prefix and whether or not you want to track time and expenses for the client's jobs.
- Other settings: This includes the client's tax ID number and whether or not you want to send them invoices and other QuickBooks-related documents electronically.
- Once you have customized the client's settings, click "Save".
Step 9: Set up user roles and permissions
In a business setting, not everyone requires the same level of access to financial information. QuickBooks allows you to set up user roles and permissions, ensuring that each team member has the appropriate level of access to perform their tasks.
- Go to the Company menu and select "Users".
- Click the "Add" button to create a new user.
- In the Add User window, enter the user's name, email address and password.
- Select the user's role from the Role drop-down menu.
- Click the Add button.
QuickBooks offers the following user roles:
- Admin: Admins have full access to QuickBooks. They can create and manage users, set up user permissions and access all of the features in QuickBooks.
- Standard: Standard users have limited access to QuickBooks. They can create and edit transactions, but they cannot create or manage users or set up user permissions.
- Restricted: Restricted users have the most limited access to QuickBooks. They can only view transactions and reports.
Step 10: Establish workflows and best practices
To get the most out of QuickBooks, it's essential to establish clear workflows and best practices. During the onboarding process, take the time to define how financial tasks will be handled, including invoicing, expense tracking and reconciliation in QuickBooks.
By establishing standardized processes, you can ensure consistency, accuracy and efficiency in your financial operations.
Step 10: Create onboarding documentation
Now that you've established your workflows and best practices, it's time to document them and communicate them to your team.

Use Scribe to create a comprehensive guide that covers the basics, including navigating the software, creating invoices, recording expenses, generating reports, etc.
 |
1. Navigate to the desired process you want to document. Click the Scribe icon in your Chrome toolbar to start.
2. Click the "Start Capture" button and walk through the process you want to document. Scribe automatically captures screenshots and text based on your actions.
3. Click the "Stop Capture" button. In a few seconds, Scribe will generate a detailed, step-by-step guide.
4. Review the guide, making sure that you've included all relevant information. You can edit to add steps or clarify information if you've missed anything.
5. Ask the AI to add titles, descriptions, additional context, alerts, helpful tips, and more to customize your guide.
6. You can personalize your training guide even more by using Pages to combine multiple guides and add videos and images. Add interactive content to lead your audience through the training.
Step 11: Train your team
Providing comprehensive training during the onboarding process is key to making sure that everyone understands how to use QuickBooks effectively. Scribe makes it easy to reference and share your training processes with colleagues and clients.
- Send a quick link.
- Export your guide into formats like PDF, HTML and Markdown.
- Share the link via your Scribe workspace.
- Add users to your Scribe workspace.
- Using the smart embed feature for seamless integration with other platforms.
As your team becomes familiar with QuickBooks, they can create their own step-by-step guides, helping you develop comprehensive training for your clients.
Step 12: Train clients on QuickBooks usage
Now you're ready to provide your clients with training on how to use QuickBooks effectively.
Use Scribe's Client Training Template to get started.
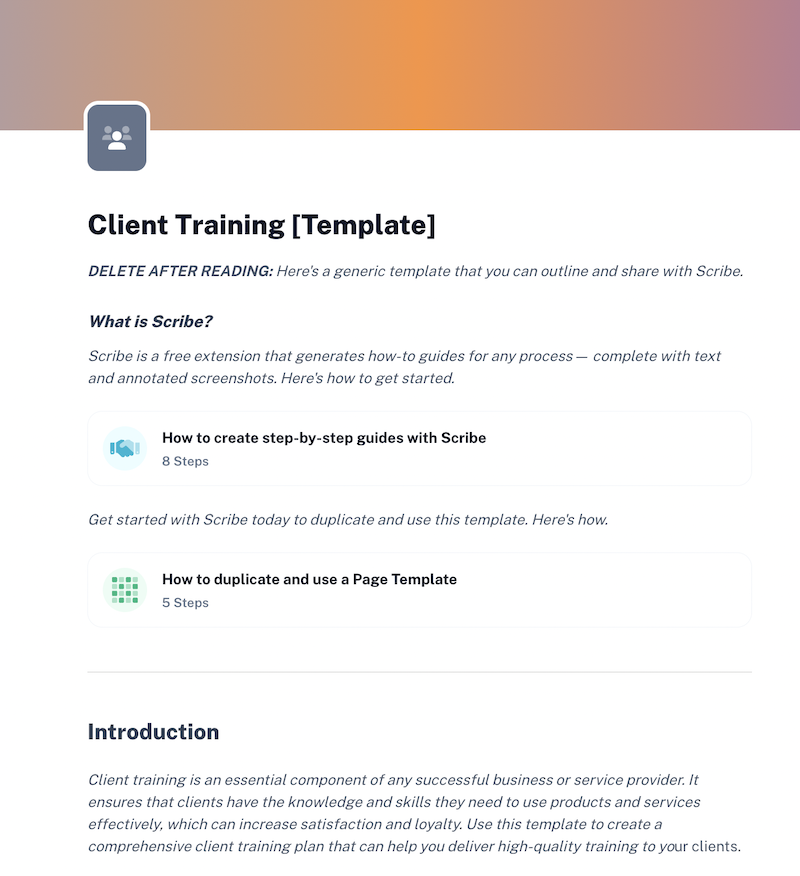
You can use Scribe to create a central repository for all of your client training resources.
Step 13: Offer ongoing support
Even after onboarding clients onto QuickBooks, providing ongoing support is crucial. Be available to answer any questions and offer assistance whenever needed.
Why use Scribe to onboard clients on QuickBooks?
Scribe streamlines your onboarding process by capturing your screen as you work, auto-generating detailed training in seconds. By using Scribe for onboarding, you can:
- Improve efficiency: With Scribe, you can provide clients with a clear roadmap of what they need to do, reducing the number of client questions and the amount of time you need to provide support.
- Reduce errors: Using Scribe for process documentation can help to reduce errors in the onboarding process by providing clients with step-by-step instructions.
- Increase consistency: By ensuring that all clients are following the same steps, you can them get up and running with QuickBooks quickly.
- Improve scalability: Scribe makes it quicker and easier to onboard new clients. Simply provide new clients with your onboarding documentation and let them follow the steps.
{{banner-customerdocs="/banner-ads"}}
Personalizing your QuickBooks onboarding process
When it comes to onboarding clients on QuickBooks, one of the most important aspects to consider is personalization. Each client is unique, with their own set of needs, preferences and goals—and you can tailor your onboarding process to meet them.
By personalizing the onboarding process for each client, you can unlock a range of benefits.
- Personalized onboarding builds trust and strengthens client relationships. It shows that you understand their unique needs and are committed to their success.
- Personalization leads to increased client satisfaction, which can lead to positive word-of-mouth referrals and long-term client loyalty.
- Personalization sets clients up for success with QuickBooks. Your clients will be more likely to use QuickBooks and achieve their financial goals.
📌 5 Accounting Memes For the Exhausted CPA
Best practices for onboarding clients on QuickBooks
1. Develop a training and support resource library. Give your clients the necessary materials and guidance to work with the software effectively.
2. Provide training and support. Develop personalized training, tutorials and resources that cater to different learning styles and levels of expertise.
3. Promote your resource library. Be sure to promote your client training and support library to your clients by sending them an email newsletter, posting about it on social media or including it in your marketing materials.
4. Address concerns and challenges. During the onboarding process, it's important to address any concerns or challenges that clients may have and provide personalized solutions.
5. Communicate and follow up regularly. Maintain regular communication with clients and provide ongoing support. This could involve scheduling regular check-ins, sending newsletters with QuickBooks tips and updates or offering training sessions.
🎓 4 Habits Accountants Should Ditch for a Fulfilling Career
Quickbooks client onboarding FAQs
What is onboarding clients on Quickbooks?
Onboarding clients refers to the process of introducing and familiarizing new clients with QuickBooks, a popular accounting software.
- QuickBooks onboarding involves setting up accounts, importing data and providing training.
- Onboarding clients on QuickBooks streamlines accounting processes, improves accuracy and provides valuable financial insights.
- A smooth onboarding experience is essential for maximizing the benefits of using QuickBooks.
Does QuickBooks offer onboarding?
Yes, QuickBooks provides a comprehensive onboarding process to help clients get started with their accounting software, including:
- Setting up software.
- Importing data from previous accounting systems.
- Providing training and support.
- QuickBooks offers tutorials, webinars and customer support for onboarding process assistance.
How do you onboard a bookkeeping client?
Onboarding a bookkeeping client by following these steps:
- Gather necessary information from the client: financial statements, bank statements and previous tax returns.
- Set up the client's account on QuickBooks with accurate information.
- Provide training and support on how to use QuickBooks effectively.
- Establish clear communication channels and regular check-ins to address questions or concerns.
How do I onboard a new client to my accounting firm?
Onboard a new client to your accounting firm by following these steps:
- Gather all necessary information from the client, including financial statements, tax returns, and relevant documentation.
- Set up the client in accounting software (e.g., QuickBooks) to streamline the process.
- Provide training and support on how to use the software effectively.
- Establish clear communication channels and set expectations for ongoing collaboration.
📌 Related resource: Top Accounting Document Management Software
Conclusion
By following this playbook, you can establish a smooth onboarding experience for your clients and help them harness the full potential of QuickBooks for their financial management needs.
Sign up for Scribe and generate step-by-step guides to help onboard clients on QuickBooks today. Happy onboarding!


