How to Blur Screenshot Details to Protect Your Info

With information theft and piracy on the rise, blurring important details in your screenshots is one simple baby step to protect your system against existing hazards.
By
Rahul Roy
min read
Updated
October 30, 2024
Photo credit
Create visual guides free

The complex organization and computerized work systems currently have made data collection and storage a major part of every sector.

This is seen in all fields and branches, regardless of the size or function of your company. That being the case, the means to support the legitimacy and reliability of said data is also becoming a major concern.

Screen recording is one of the easiest and most effective ways to get this confusion sorted out.

By making use of screenshotting and recording tools, many businesses and operating systems are being benefited greatly. Here is how you can make use of these screenshots and their extensive features for the benefit of your work system and setup.

Screenshots & their perks in data management

Initially, not many computer users were aware of the screenshot feature. This is held in a few situations even now. Every computer nowadays comes with an exclusive button or a shortcut designated for capturing screenshots, which is why it has become an easy means to record important pieces of data. 

Rather than making an effort to collect and enter the data separately in the designated place, clicking a screenshot simplifies this process greatly and reduces the risk of missing out on important information. Since it does not require any additional extension or download per se, it is also a very universal means of collecting data. Once secured, information can be patiently extracted from the same, without concern about a limited time frame. This also allows the users to work at a more comfortable pace, thereby providing end-products with overall improved quality and work efficiency. 

Another important benefit of using screenshots as a means of your base data is that you can always use them as proof to back up the reliability and accuracy of your work. This is especially important in the case of bigger workplaces and the workforce, as you will be working with a bigger crowd of people, where internal conflict and issues or partialism can be pretty common. 

Add-ons & tools to improve your screenshots

Using screenshots helps you organize your work better and function in a more composed manner.

Being clear with your workspace is a direct addition to your overall work efficiency and has an extended effect on productivity as well. Owing to the increased utilization of screenshots for rather serious endeavors like business data management, many leading software developers and app creators have now come up with ways to improve how people use the screenshot function.

With screenshots being used in professional settings like business data management, using in-built tools which allow users to highlight, cut, blur and hide data on the screenshot is extremely useful. 

These tools can help team members complete multiple jobs at once, saving a huge amount of time which can now be used in other areas that require attention.

The most important functions for the workplace are blurring and highlighting. Here's how you can easily blur screenshots with Scribe.

{{banner-short-v2="/banner-ads"}}

Using a screen capture tool

Once you settle on a screen capture tool that meets all your criteria, you will then have to get familiar with how to use it. Scribe is a screenshot Chrome extension that turns any workflow into a how-to guide.

Here's how it works.  

Step 1: Record your process

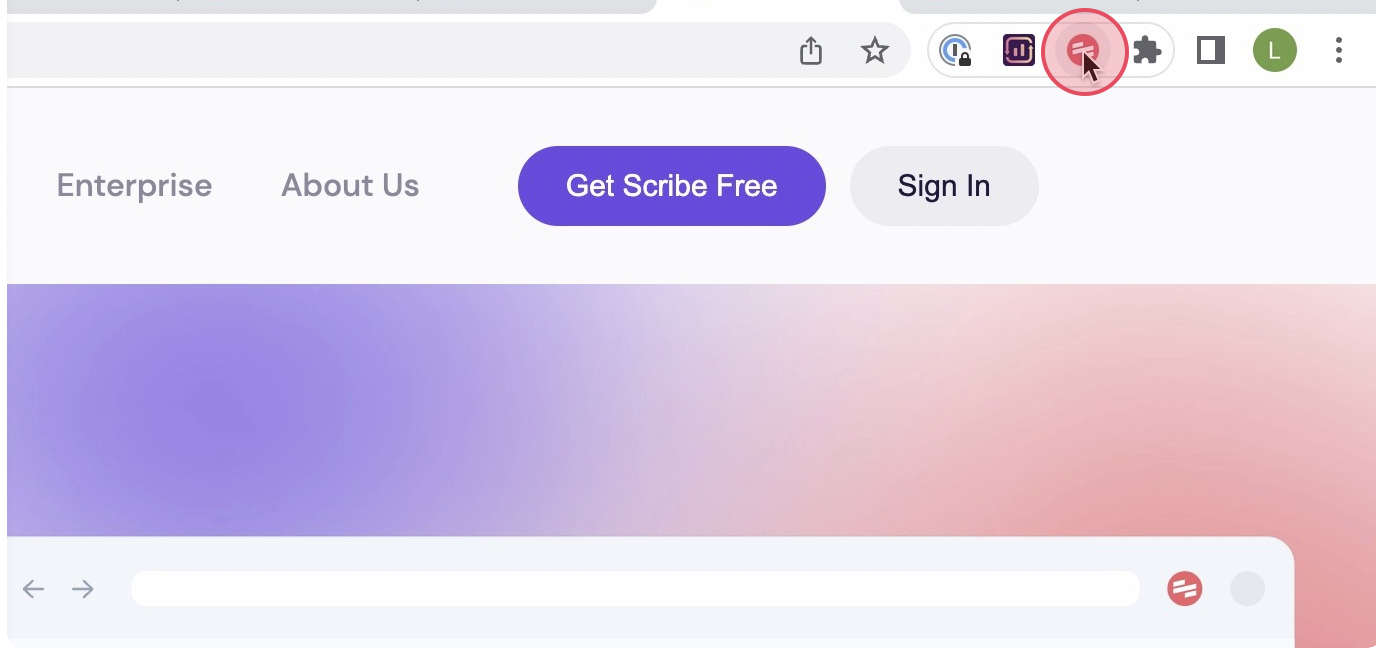
Once you’ve installed Scribe, navigate to the process that you want to document and click on the Scribe icon in your Chrome toolbar.
How to blur a screenshot


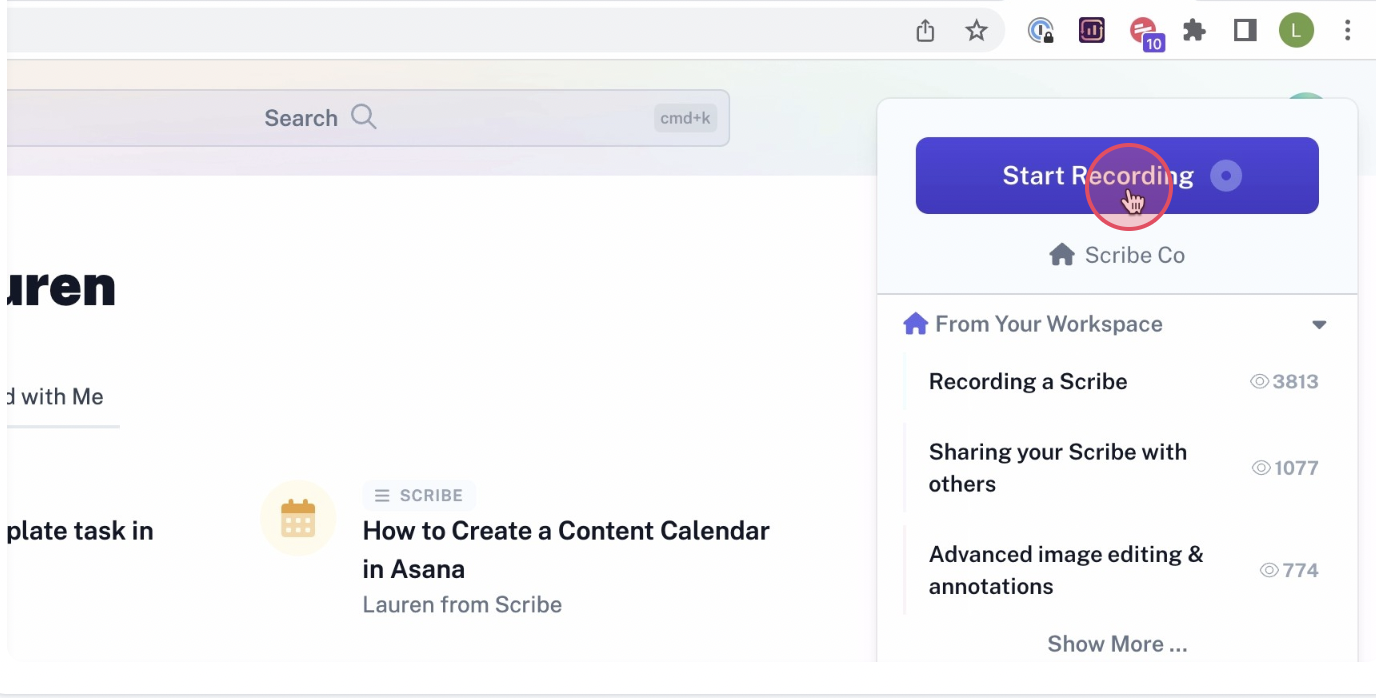
‍Then, click ‘Record’. This will start the recording process, and Scribe will automatically capture screenshots and text as you navigate through the process.
How to blur a screenshot


Step 2: Stop recording

Once you’re done your process, click ‘Stop Recording’ This will stop the Scribe recording and auto-generate the document.

How to blur a screenshot


Step 3: Edit & customize

Once you've finished the process, Scribe will auto-generate a step-by-step guide for you based on the screenshots and text it captured.

Review the guide to ensure that it accurately reflects the process, and edit it as needed to add additional information or clarify any steps.

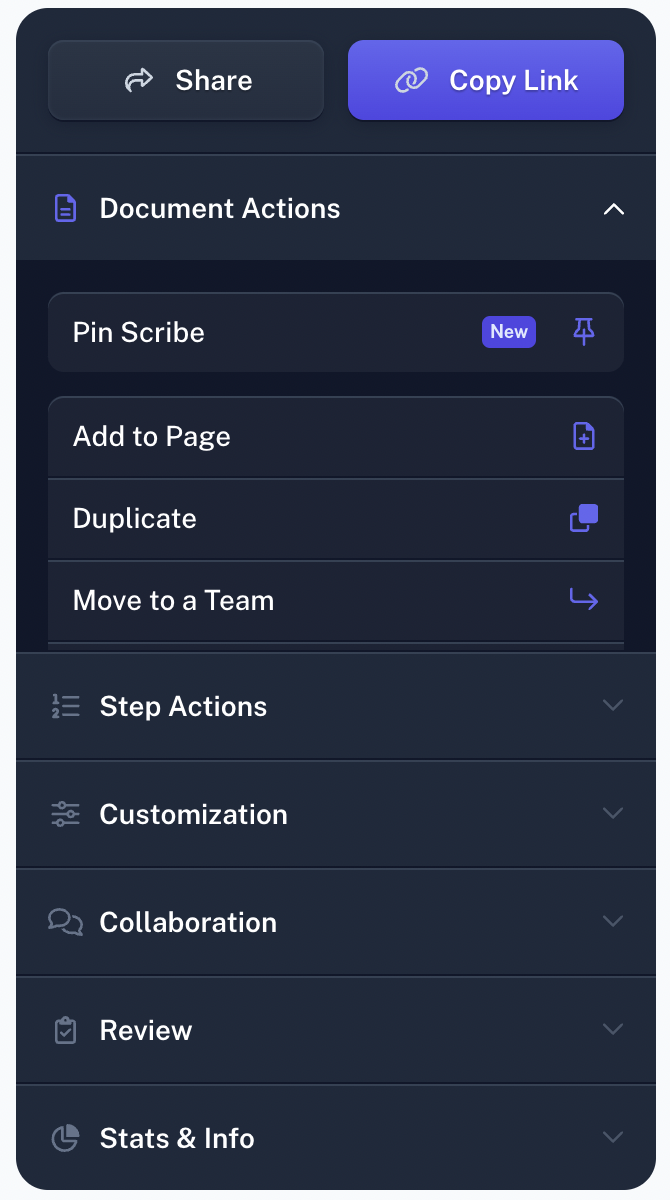
You can customize your guide by adding tips and tricks, updating steps, and annotating screenshots. You can also combine multiple guides with text and video in Pages.
how to blur a screenshot


Step 4: Share with your team or customers

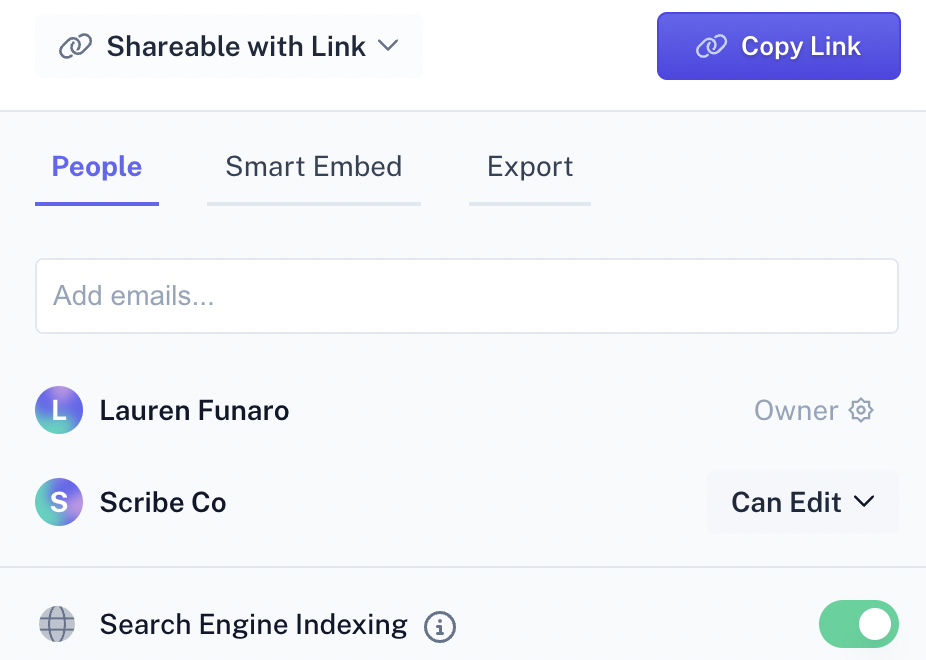
You can share your guide with your team by adding them to your Scribe workspace, sharing the guide via a link, or embedding it in your documentation. You can also export your guide to PDF, HTML, or Markdown.


That's it! With Scribe, you can quickly and easily create detailed documents that will help you streamline your processes and improve your team's productivity.

Mind blown 🤯 by what @ScribeHow can do.

You do a web screen recording, and it does the rest. I did this in 26 seconds! Then spent less than a minute updating it to my liking.

Then with the free version, you can share it as a PDF or URL 👇https://t.co/oAKfIAE0Uz pic.twitter.com/lZxx1BdFdo

— Carl Storms (@theBIMsider) December 8, 2022

‎How to blur screenshots

No need to worry about sensitive information ending up in your Scribe screenshots — Scribe's Smart Blur feature has you covered!

Pro and Enterprise users can proactively blur certain sensitive information out of your Scribes with Smart Blur.

Users can choose between seven  types of sensitive data to blur automatically:

  • Email addresses.
  • Numbers.
  • Common names.
  • Long text.
  • Form fields.
  • Table rows.
  • Images.

Just click the toggle next to any of the data types you wish to blur, and you'll see a blurred effect automatically applied to your screen.

If you have any additional elements that you want to blur out, select "Choose Elements" and click the elements you want to be redacted.

Your finished Scribe will have those blurred-out areas in the screenshots and nobody will be able to see what's underneath!

Why should you blur screenshots?

Depending upon the intensity of your data, you will have to choose between the different means of hiding your data. In case you are working with highly confidential data and wish to leave no window for even a minuscule chance of revealing your info, redacting would be a good idea. This involves completely creating a blacked-out box to cover your data.

However, blurring out information is the most preferred means of hiding confidential data and is widely being used across different sectors and scales. This is mainly because the blurring tool does not completely tamper with the presentation.

1. Blur sensitive data

This is applicable for all uses, personal, business, professional, and more. Sensitive data could range from anything as simple as funny text to rather important login details and card credentials.

Using this tool allows you to blur sensitive info like passwords effectively in such a way that even the length is not deducible. This aspect is especially helpful for those involved in creating how-to guides by providing clear videos without any hindrance caused by such private data.

2. Wipe out unnecessary details

In a few cases, there are additional factors and details on the screen which divert the attention from the main aspect of focus. This could be an accompanying drop-down menu or something minimal. By using the blur tool, you do not tamper with the visual guide per se but improve the attention to the item in focus.

This is also applicable for blurring out faces and details in the backgrounds of images for both personal and professional usage.

3. Client details

While dealing with important forms, bills, or similar items, especially in business that operates mainly via online means and electronic transactions, it is important to respect the confidentiality and privacy of the parties involved. In this case, it would be ideal for blurring out any important numbers, domain names, and even addresses that are to be kept private.

Another important thing to take care of with businesses would be the spreadsheet details and statistics. In most cases, these numbers are very sensitive and require protection. However, the charts are to be visualized, making the blur tool a perfect choice as it retains the aesthetic aspect of your data.

Conclusion

To wrap things up, businesses these days are increasingly relying upon online means for managing and recording their data.

That being the case, screenshots and recordings are growing to be one of the major components of this system.

Making use of said tools and features helps involved personnel simplify their work by several folds. These tools are also of great help in maintaining good accuracy with the details recorded, thereby preventing any possible discrepancy which may arise in the future.

How to Blur Screenshot Details to Protect Your Info

By
Rahul Roy
December 28, 2022
min read
Updated
October 30, 2024
Photo credit
With information theft and piracy on the rise, blurring important details in your screenshots is one simple baby step to protect your system against existing hazards.
Create visual guides free


Introduction

The complex organization and computerized work systems currently have made data collection and storage a major part of every sector.

This is seen in all fields and branches, regardless of the size or function of your company. That being the case, the means to support the legitimacy and reliability of said data is also becoming a major concern.

Screen recording is one of the easiest and most effective ways to get this confusion sorted out.

By making use of screenshotting and recording tools, many businesses and operating systems are being benefited greatly. Here is how you can make use of these screenshots and their extensive features for the benefit of your work system and setup.

Screenshots & their perks in data management

Initially, not many computer users were aware of the screenshot feature. This is held in a few situations even now. Every computer nowadays comes with an exclusive button or a shortcut designated for capturing screenshots, which is why it has become an easy means to record important pieces of data. 

Rather than making an effort to collect and enter the data separately in the designated place, clicking a screenshot simplifies this process greatly and reduces the risk of missing out on important information. Since it does not require any additional extension or download per se, it is also a very universal means of collecting data. Once secured, information can be patiently extracted from the same, without concern about a limited time frame. This also allows the users to work at a more comfortable pace, thereby providing end-products with overall improved quality and work efficiency. 

Another important benefit of using screenshots as a means of your base data is that you can always use them as proof to back up the reliability and accuracy of your work. This is especially important in the case of bigger workplaces and the workforce, as you will be working with a bigger crowd of people, where internal conflict and issues or partialism can be pretty common. 

Add-ons & tools to improve your screenshots

Using screenshots helps you organize your work better and function in a more composed manner.

Being clear with your workspace is a direct addition to your overall work efficiency and has an extended effect on productivity as well. Owing to the increased utilization of screenshots for rather serious endeavors like business data management, many leading software developers and app creators have now come up with ways to improve how people use the screenshot function.

With screenshots being used in professional settings like business data management, using in-built tools which allow users to highlight, cut, blur and hide data on the screenshot is extremely useful. 

These tools can help team members complete multiple jobs at once, saving a huge amount of time which can now be used in other areas that require attention.

The most important functions for the workplace are blurring and highlighting. Here's how you can easily blur screenshots with Scribe.

{{banner-short-v2="/banner-ads"}}

Using a screen capture tool

Once you settle on a screen capture tool that meets all your criteria, you will then have to get familiar with how to use it. Scribe is a screenshot Chrome extension that turns any workflow into a how-to guide.

Here's how it works.  

Step 1: Record your process

Once you’ve installed Scribe, navigate to the process that you want to document and click on the Scribe icon in your Chrome toolbar.

How to blur a screenshot


‍Then, click ‘Record’. This will start the recording process, and Scribe will automatically capture screenshots and text as you navigate through the process.

How to blur a screenshot


Step 2: Stop recording

Once you’re done your process, click ‘Stop Recording’ This will stop the Scribe recording and auto-generate the document.

How to blur a screenshot


Step 3: Edit & customize

Once you've finished the process, Scribe will auto-generate a step-by-step guide for you based on the screenshots and text it captured.

Review the guide to ensure that it accurately reflects the process, and edit it as needed to add additional information or clarify any steps.

You can customize your guide by adding tips and tricks, updating steps, and annotating screenshots. You can also combine multiple guides with text and video in Pages.

how to blur a screenshot


Step 4: Share with your team or customers

You can share your guide with your team by adding them to your Scribe workspace, sharing the guide via a link, or embedding it in your documentation. You can also export your guide to PDF, HTML, or Markdown.


That's it! With Scribe, you can quickly and easily create detailed documents that will help you streamline your processes and improve your team's productivity.

Mind blown 🤯 by what @ScribeHow can do.

You do a web screen recording, and it does the rest. I did this in 26 seconds! Then spent less than a minute updating it to my liking.

Then with the free version, you can share it as a PDF or URL 👇https://t.co/oAKfIAE0Uz pic.twitter.com/lZxx1BdFdo

— Carl Storms (@theBIMsider) December 8, 2022

‎How to blur screenshots

No need to worry about sensitive information ending up in your Scribe screenshots — Scribe's Smart Blur feature has you covered!

Pro and Enterprise users can proactively blur certain sensitive information out of your Scribes with Smart Blur.

Users can choose between seven  types of sensitive data to blur automatically:

  • Email addresses.
  • Numbers.
  • Common names.
  • Long text.
  • Form fields.
  • Table rows.
  • Images.

Just click the toggle next to any of the data types you wish to blur, and you'll see a blurred effect automatically applied to your screen.

If you have any additional elements that you want to blur out, select "Choose Elements" and click the elements you want to be redacted.

Your finished Scribe will have those blurred-out areas in the screenshots and nobody will be able to see what's underneath!

Why should you blur screenshots?

Depending upon the intensity of your data, you will have to choose between the different means of hiding your data. In case you are working with highly confidential data and wish to leave no window for even a minuscule chance of revealing your info, redacting would be a good idea. This involves completely creating a blacked-out box to cover your data.

However, blurring out information is the most preferred means of hiding confidential data and is widely being used across different sectors and scales. This is mainly because the blurring tool does not completely tamper with the presentation.

1. Blur sensitive data

This is applicable for all uses, personal, business, professional, and more. Sensitive data could range from anything as simple as funny text to rather important login details and card credentials.

Using this tool allows you to blur sensitive info like passwords effectively in such a way that even the length is not deducible. This aspect is especially helpful for those involved in creating how-to guides by providing clear videos without any hindrance caused by such private data.

2. Wipe out unnecessary details

In a few cases, there are additional factors and details on the screen which divert the attention from the main aspect of focus. This could be an accompanying drop-down menu or something minimal. By using the blur tool, you do not tamper with the visual guide per se but improve the attention to the item in focus.

This is also applicable for blurring out faces and details in the backgrounds of images for both personal and professional usage.

3. Client details

While dealing with important forms, bills, or similar items, especially in business that operates mainly via online means and electronic transactions, it is important to respect the confidentiality and privacy of the parties involved. In this case, it would be ideal for blurring out any important numbers, domain names, and even addresses that are to be kept private.

Another important thing to take care of with businesses would be the spreadsheet details and statistics. In most cases, these numbers are very sensitive and require protection. However, the charts are to be visualized, making the blur tool a perfect choice as it retains the aesthetic aspect of your data.

Conclusion

To wrap things up, businesses these days are increasingly relying upon online means for managing and recording their data.

That being the case, screenshots and recordings are growing to be one of the major components of this system.

Making use of said tools and features helps involved personnel simplify their work by several folds. These tools are also of great help in maintaining good accuracy with the details recorded, thereby preventing any possible discrepancy which may arise in the future.

Ready to try Scribe?

Scribe automatically generates how-to guides and serves them to your team when they need them most. Save time, stay focused, help others.