How to Use ClickUp for Project Management

Learn how to effectively manage your projects with ClickUp. Discover customizable workflows, real-time collaboration and more. Optimize your project management with ClickUp today.
By
Christina Ballinger
min read
Updated
October 30, 2024
Photo credit
Create Step-by-Step Guides in Seconds

Jump to...

Are you tired of juggling multiple project management tools and struggling to keep everything organized?

This playbook shows you how to use ClickUp for effective project management.

Playbook: ClickUp project management

  • ClickUp is a comprehensive project management tool that offers customizable workflows, an intuitive interface, and real-time collaboration to streamline project management.
  • Key features include a project management dashboard, customizable assignees, Gantt charts, Kanban boards, and time tracking.
  • ClickUp also provides robust documentation features, including project wikis, file attachments, collaboration, and more.
  • By integrating with Scribe, ClickUp enhances project management efficiency by generating and improving project documentation.
  • Follow the step-by-step guide to set up and customize ClickUp for project management.

Wh‎y use ClickUp for project management

ClickUp offers a wide range of features that make it the perfect tool for managing your projects. When you integrate Clickup with Scribe, you can easily manage projects and share process guides with your team.

Here are a few reasons why you should consider using ClickUp:

1. All-in-one solution

ClickUp combines task management, collaboration and communication features in one platform, eliminating the need for multiple tools.

2. Customizable workflows

With ClickUp, you can create custom workflows tailored to your team's specific needs, ensuring efficient project execution. With tools like Scribe, you can capture embed guides for any Clickup process.

3. Intuitive interface

ClickUp's user-friendly interface makes it easy for both beginners and experienced project managers to navigate and use its features effectively.

4. Real-time collaboration

ClickUp allows team members to collaborate in real time, ensuring everyone stays on the same page and reducing miscommunication.

Ho‎w to use ClickUp for project management

Now that you understand the benefits and features of ClickUp let's dive into the step-by-step process of using ClickUp for project management.


Step 1: Sign up for ClickUp and download Scribe

Visit ClickUp's website and sign up for an account. You can choose between the free plan or opt for one of their paid plans for additional features and storage.

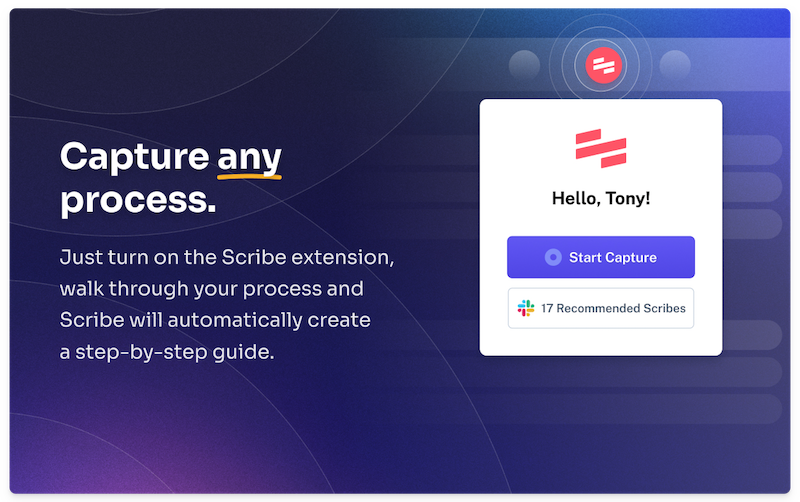
Download Scribe so you can capture and embed visual process guides for your team. Here's how to get started. ➜


Step 2: Create a workspace

Once you're signed in, create a workspace for your project. Workspaces act as containers for your projects, allowing you to keep everything organized.

  1. Go to the ClickUp website and log in to your account.
  2. Click on the "Workspaces" tab.
  3. Click on the "Create new" button.
  4. Give your workspace a name.
  5. Select a workspace template.
  6. Click on the "Create" button.

Step 3: Create projects

Within your workspace, create individual projects for each of your initiatives. This helps you maintain a clear separation between different projects.

  1. Click on the "Projects" tab.
  2. Click on the "Create new" button.
  3. Give your project a name.
  4. Select a project template.
  5. Click on the "Create" button.

Step 4: Set up custom workflows

For each project, set up custom workflows based on your specific requirements.

  1. Click on the "Settings" gear icon in the top right corner of the screen.
  2. Click on "Workflows".
  3. Click on the "Create new" button.
  4. Give your workflow a name.
  5. Select the statuses that you want to include in your workflow.
  6. Click on the "Create" button.

Once you've created a custom workflow, you can start adding tasks to it. When you add a task to a workflow, select the task status. The task will then move through the workflow based on the statuses that you selected.

Use Scribe to build guides for your workflows that you can share with your team.

Step 5: Create a ClickUp Doc for your project documentation

  1. Create a new Doc by clicking on the "Create" button in the top left corner of the ClickUp window and selecting "Doc".
  2. Give your Doc a title and description.
  3. Start writing your documentation. You can use the formatting options in the toolbar to make your documentation look professional.
  4. You can also embed Scribes, images, videos, and code snippets in your documentation.
  5. When you are finished writing your documentation, click on the "Save" button.

Step 6: Build your project documentation

Capture and share your processes in your tasks by using Scribe to generate visual step-by-step guides.



You can also use Scribe's AI to generate a document from scratch or use one of the templates in Scribe's extensive page templates library to build your project documentation:

To get started, install Scribe and follow the steps below:

1. Navigate to the desired process you want to document. Click the Scribe icon in your Chrome toolbar to start.

2. Click the "Start Capture" button and walk through the process you want to document. Scribe automatically captures screenshots and text based on your actions.

3. Click the "Stop Recording" button. In a few seconds, Scribe will generate a detailed, step-by-step guide.

4. Review the guide, making sure that you've included all relevant information. You can edit to add steps or clarify information if you've missed anything.

5. Ask the AI to add titles, descriptions, additional context, alerts, helpful tips, and more to customize your guide.

6. When your guide is finished, click "Share" and then "Embed".

7. Navigate to your workspace in ClickUp.

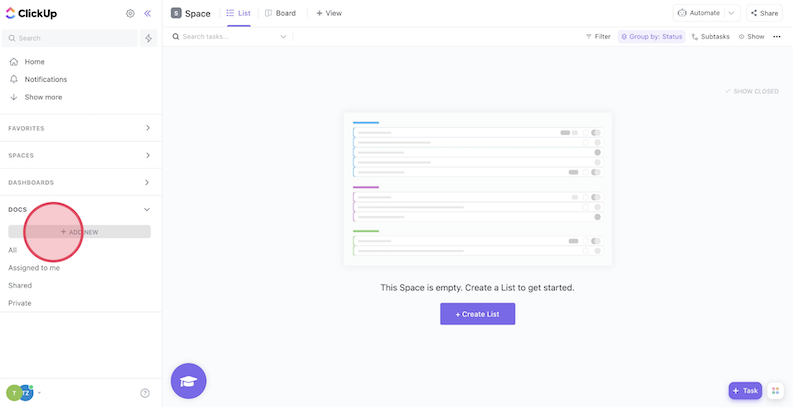
8. Click "+Add New" to add a new page.

9. Give your Page a title, then in the body, type "/embed" and select "Embed".

10. Paste in the embed snippet and click "SAVE".

11. Resize accordingly and your Scribe is ready to go!

Step 7: Collaborate and communicate

Invite team members to your workspace and projects. From the Workspace Settings or Project Settings:

  1. Click on the Members tab.
  2. Click the "Invite Members" button.
  3. Enter the email addresses of the people you want to invite.
  4. Select the roles that you want to give them.
  5. Click the "Invite" button.
  6. Your team will receive an email with a link to accept the invitation. Once they have accepted the invitation, they will be able to access your workspace or project.

Step 8: Track progress and make adjustments

Regularly monitor the progress of tasks and projects using ClickUp's range of sorting and filtering options.

  • Check-in on users to see who's on track and who needs help.
  • Save options as favorites for easy access.
  • Save filters for popular searches, such as high-priority and overdue tasks.
  • Customize settings based on the project, including the ability to have multiple assignees when needed.
  • Make adjustments to workflows or task assignments as needed to ensure smooth project execution.

{{banner-short-v2="/banner-ads"}}

‎‎‎Cl‎ickUp project management documentation

ClickUp also offers robust documentation features to help you keep track of project details and important information. Here are a few ways you can use this feature:

1. Create a project wiki

Use ClickUp's Wiki feature to create a centralized repository of project-related information, including guidelines, resources and FAQs.

You can also use ClickUp Docs to create unlimited docs and knowledge bases.

2. Attach relevant documentation

Easily attach relevant files, documents, and images to tasks or project pages, ensuring all necessary information is readily accessible.

3. Commenting and mentions

Collaborate effectively by leaving comments on tasks or pages and mentioning team members to notify them of important updates or discussions.

4. Mind maps: Plan out your projects, ideas and tasks with Mind Maps for the ultimate visual outline.

Generate visual project documentation and process guides for free ➜

Wh‎y use Scribe with ClickUp?

You can save time and improve the efficiency of your projects by using Scribe with ClickUp for project management.

Powered by AI, Scribe can generate an entire document from scratch or improve your existing documentation by editing for grammar, length and tone.

Here are just a few ways that Scribe can streamline your project management:

  • Process documentation: With Scribe, you can document your processes and procedures in seconds. They can be used to train new employees, troubleshoot problems and ensure that tasks are performed consistently.
  • Standardize operating procedures: You can use Scribe to create project management SOPs to ensure your projects are completed consistently and efficiently.
  • Boost communication: Create visual step-by-step guides outlining your standard procedures for communication, updates and reports on projects.
  • Knowledge base articles: Use Scribe to create a knowledge base to answer questions and resolve problems. You can also use it to provide self-service support to customers or employees.
  • Real-time updates: With easy feedback and universal updates, you can easily keep your documentation accurate, reliable and up-to-date.
  • Seamless integration: Scribe integrates seamlessly with ClickUp, making it simple to add your documentation in just a few clicks.

"Scribe's been a real game-changer for me, no more having to stop and take screenshots while I'm working. The best part? It's all automatic. No more manual documentation for me—that's a huge win in my book." —Qwantel M., Founder & Business Manager

Cl‎ickUp project management features

Before diving into the step-by-step guide, let's explore some of the key project management features offered by ClickUp:

1. Project management dashboard

ClickUp's project management dashboard provides real-time insights and updates. The dashboard's customizable features, such as charts and graphs, enable teams to visualize project data and make informed decisions.

2. Customizable assignees

ClickUp offers the flexibility to customize assignees based on project requirements. This feature allows users to have multiple assignees when needed and avoid unnecessary assignees when they are not required.

3. Gantt charts

Visualize project timelines and dependencies using ClickUp's Gantt charts, enabling you to plan and manage projects more effectively.

4. Kanban boards

ClickUp's Kanban boards provide a visual representation of your project's workflow, making it easy to track progress and identify bottlenecks.

5. Time tracking

Keep track of the time spent on each task using ClickUp's built-in time tracking feature, ensuring accurate project progress monitoring.

Cl‎ickUp custom workflows for project management

One of the standout features of ClickUp is its ability to create custom workflows. Here's how you can set up a custom workflow for your project:

1. Identify workflow stages

Determine the stages your project will go through, such as "To Do," "In Progress," "Review," and "Completed."

2. Create custom statuses

Within each stage, you can create custom statuses that reflect the progress of your tasks. For example, in the "To Do" stage, you can have statuses like "Backlog," "Urgent," or "Upcoming."

3. Task management

ClickUp provides a comprehensive task management system, allowing you to create, assign and track tasks effortlessly. Use ClickUp's priority and labeling features to ensure tasks are organized and easily identifiable.

4. Track progress

Monitor the progress of tasks by updating their statuses as they move through the workflow stages. This provides a clear overview of the project's status at any given time.

5. Reporting

ClickUp's reporting features allow you to track your team's progress and identify areas where you can improve. You can create custom reports or use one of ClickUp's pre-built reports.

6. Custom work views

With over 15 custom work views available, including Board view, Gantt chart view, and Workload view, users can tailor their project management approach to their unique workflows and personal preferences.

Clickup project management FA‎Qs

Is ClickUp used for project management?

Yes, ClickUp's wide range of features make it a popular choice for project managers:

  • Users can track and report on project progress.
  • Collaboration with team members is easy.
  • Effective organization of documents.
  • Features include sprint management, kanban boards, whiteboards, and collaborative documents.
  • ClickUp's AI tool provides over 100 customizable templated prompts.

Is ClickUp project management free?

Yes, ClickUp offers a free version of its project management software.

  • The free plan includes unlimited tasks, unlimited users, and 100MB of storage.
  • Paid plans start at $5 per user per month.
  • The paid plans include features like time tracking, custom fields and integrations with other tools.

How do I use ClickUp for a project?

To use ClickUp for a project, start by creating a workspace and then add your team members. You can then create tasks, assign them to team members, and set due dates. ClickUp also allows you to create custom statuses, set priorities, and track progress using various views such as lists, boards and timelines.

What are the alternatives to ClickUp project management?

If you're looking for alternatives to ClickUp project management, here are three popular options:

  • Trello offers a simple and intuitive interface for managing projects and tasks.
  • Asana provides a comprehensive set of features for project management, including task tracking, team collaboration, and reporting.
  • Monday.com is another alternative that offers customizable workflows and integrations with various tools.

Co‎nclusion

From customizable workflows to real-time collaboration, ClickUp has everything you need to stay organized and achieve project success. By following the step-by-step guide outlined in this blog post, you'll be well on your way to mastering ClickUp for effective project management.

With Scribe and ClickUp, you can streamline your project management, create project documentation in seconds, and boost productivity and efficiency. So why wait? Sign up for Scribe today and take your project management to the next level!

How to Use ClickUp for Project Management

By
Christina Ballinger
September 16, 2023
min read
Updated
October 30, 2024
Photo credit
Learn how to effectively manage your projects with ClickUp. Discover customizable workflows, real-time collaboration and more. Optimize your project management with ClickUp today.
Create Step-by-Step Guides in Seconds


Introduction

Jump to...

Are you tired of juggling multiple project management tools and struggling to keep everything organized?

This playbook shows you how to use ClickUp for effective project management.

Playbook: ClickUp project management

  • ClickUp is a comprehensive project management tool that offers customizable workflows, an intuitive interface, and real-time collaboration to streamline project management.
  • Key features include a project management dashboard, customizable assignees, Gantt charts, Kanban boards, and time tracking.
  • ClickUp also provides robust documentation features, including project wikis, file attachments, collaboration, and more.
  • By integrating with Scribe, ClickUp enhances project management efficiency by generating and improving project documentation.
  • Follow the step-by-step guide to set up and customize ClickUp for project management.

Wh‎y use ClickUp for project management

ClickUp offers a wide range of features that make it the perfect tool for managing your projects. When you integrate Clickup with Scribe, you can easily manage projects and share process guides with your team.

Here are a few reasons why you should consider using ClickUp:

1. All-in-one solution

ClickUp combines task management, collaboration and communication features in one platform, eliminating the need for multiple tools.

2. Customizable workflows

With ClickUp, you can create custom workflows tailored to your team's specific needs, ensuring efficient project execution. With tools like Scribe, you can capture embed guides for any Clickup process.

3. Intuitive interface

ClickUp's user-friendly interface makes it easy for both beginners and experienced project managers to navigate and use its features effectively.

4. Real-time collaboration

ClickUp allows team members to collaborate in real time, ensuring everyone stays on the same page and reducing miscommunication.

Ho‎w to use ClickUp for project management

Now that you understand the benefits and features of ClickUp let's dive into the step-by-step process of using ClickUp for project management.


Step 1: Sign up for ClickUp and download Scribe

Visit ClickUp's website and sign up for an account. You can choose between the free plan or opt for one of their paid plans for additional features and storage.

Download Scribe so you can capture and embed visual process guides for your team. Here's how to get started. ➜


Step 2: Create a workspace

Once you're signed in, create a workspace for your project. Workspaces act as containers for your projects, allowing you to keep everything organized.

  1. Go to the ClickUp website and log in to your account.
  2. Click on the "Workspaces" tab.
  3. Click on the "Create new" button.
  4. Give your workspace a name.
  5. Select a workspace template.
  6. Click on the "Create" button.

Step 3: Create projects

Within your workspace, create individual projects for each of your initiatives. This helps you maintain a clear separation between different projects.

  1. Click on the "Projects" tab.
  2. Click on the "Create new" button.
  3. Give your project a name.
  4. Select a project template.
  5. Click on the "Create" button.

Step 4: Set up custom workflows

For each project, set up custom workflows based on your specific requirements.

  1. Click on the "Settings" gear icon in the top right corner of the screen.
  2. Click on "Workflows".
  3. Click on the "Create new" button.
  4. Give your workflow a name.
  5. Select the statuses that you want to include in your workflow.
  6. Click on the "Create" button.

Once you've created a custom workflow, you can start adding tasks to it. When you add a task to a workflow, select the task status. The task will then move through the workflow based on the statuses that you selected.

Use Scribe to build guides for your workflows that you can share with your team.

Step 5: Create a ClickUp Doc for your project documentation

  1. Create a new Doc by clicking on the "Create" button in the top left corner of the ClickUp window and selecting "Doc".
  2. Give your Doc a title and description.
  3. Start writing your documentation. You can use the formatting options in the toolbar to make your documentation look professional.
  4. You can also embed Scribes, images, videos, and code snippets in your documentation.
  5. When you are finished writing your documentation, click on the "Save" button.

Step 6: Build your project documentation

Capture and share your processes in your tasks by using Scribe to generate visual step-by-step guides.


You can also use Scribe's AI to generate a document from scratch or use one of the templates in Scribe's extensive page templates library to build your project documentation:

To get started, install Scribe and follow the steps below:

1. Navigate to the desired process you want to document. Click the Scribe icon in your Chrome toolbar to start.

2. Click the "Start Capture" button and walk through the process you want to document. Scribe automatically captures screenshots and text based on your actions.

3. Click the "Stop Recording" button. In a few seconds, Scribe will generate a detailed, step-by-step guide.

4. Review the guide, making sure that you've included all relevant information. You can edit to add steps or clarify information if you've missed anything.

5. Ask the AI to add titles, descriptions, additional context, alerts, helpful tips, and more to customize your guide.

6. When your guide is finished, click "Share" and then "Embed".

7. Navigate to your workspace in ClickUp.

8. Click "+Add New" to add a new page.

9. Give your Page a title, then in the body, type "/embed" and select "Embed".

10. Paste in the embed snippet and click "SAVE".

11. Resize accordingly and your Scribe is ready to go!

Step 7: Collaborate and communicate

Invite team members to your workspace and projects. From the Workspace Settings or Project Settings:

  1. Click on the Members tab.
  2. Click the "Invite Members" button.
  3. Enter the email addresses of the people you want to invite.
  4. Select the roles that you want to give them.
  5. Click the "Invite" button.
  6. Your team will receive an email with a link to accept the invitation. Once they have accepted the invitation, they will be able to access your workspace or project.

Step 8: Track progress and make adjustments

Regularly monitor the progress of tasks and projects using ClickUp's range of sorting and filtering options.

  • Check-in on users to see who's on track and who needs help.
  • Save options as favorites for easy access.
  • Save filters for popular searches, such as high-priority and overdue tasks.
  • Customize settings based on the project, including the ability to have multiple assignees when needed.
  • Make adjustments to workflows or task assignments as needed to ensure smooth project execution.

{{banner-short-v2="/banner-ads"}}

‎‎‎Cl‎ickUp project management documentation

ClickUp also offers robust documentation features to help you keep track of project details and important information. Here are a few ways you can use this feature:

1. Create a project wiki

Use ClickUp's Wiki feature to create a centralized repository of project-related information, including guidelines, resources and FAQs.

You can also use ClickUp Docs to create unlimited docs and knowledge bases.

2. Attach relevant documentation

Easily attach relevant files, documents, and images to tasks or project pages, ensuring all necessary information is readily accessible.

3. Commenting and mentions

Collaborate effectively by leaving comments on tasks or pages and mentioning team members to notify them of important updates or discussions.

4. Mind maps: Plan out your projects, ideas and tasks with Mind Maps for the ultimate visual outline.

Generate visual project documentation and process guides for free ➜

Wh‎y use Scribe with ClickUp?

You can save time and improve the efficiency of your projects by using Scribe with ClickUp for project management.

Powered by AI, Scribe can generate an entire document from scratch or improve your existing documentation by editing for grammar, length and tone.

Here are just a few ways that Scribe can streamline your project management:

  • Process documentation: With Scribe, you can document your processes and procedures in seconds. They can be used to train new employees, troubleshoot problems and ensure that tasks are performed consistently.
  • Standardize operating procedures: You can use Scribe to create project management SOPs to ensure your projects are completed consistently and efficiently.
  • Boost communication: Create visual step-by-step guides outlining your standard procedures for communication, updates and reports on projects.
  • Knowledge base articles: Use Scribe to create a knowledge base to answer questions and resolve problems. You can also use it to provide self-service support to customers or employees.
  • Real-time updates: With easy feedback and universal updates, you can easily keep your documentation accurate, reliable and up-to-date.
  • Seamless integration: Scribe integrates seamlessly with ClickUp, making it simple to add your documentation in just a few clicks.

"Scribe's been a real game-changer for me, no more having to stop and take screenshots while I'm working. The best part? It's all automatic. No more manual documentation for me—that's a huge win in my book." —Qwantel M., Founder & Business Manager

Cl‎ickUp project management features

Before diving into the step-by-step guide, let's explore some of the key project management features offered by ClickUp:

1. Project management dashboard

ClickUp's project management dashboard provides real-time insights and updates. The dashboard's customizable features, such as charts and graphs, enable teams to visualize project data and make informed decisions.

2. Customizable assignees

ClickUp offers the flexibility to customize assignees based on project requirements. This feature allows users to have multiple assignees when needed and avoid unnecessary assignees when they are not required.

3. Gantt charts

Visualize project timelines and dependencies using ClickUp's Gantt charts, enabling you to plan and manage projects more effectively.

4. Kanban boards

ClickUp's Kanban boards provide a visual representation of your project's workflow, making it easy to track progress and identify bottlenecks.

5. Time tracking

Keep track of the time spent on each task using ClickUp's built-in time tracking feature, ensuring accurate project progress monitoring.

Cl‎ickUp custom workflows for project management

One of the standout features of ClickUp is its ability to create custom workflows. Here's how you can set up a custom workflow for your project:

1. Identify workflow stages

Determine the stages your project will go through, such as "To Do," "In Progress," "Review," and "Completed."

2. Create custom statuses

Within each stage, you can create custom statuses that reflect the progress of your tasks. For example, in the "To Do" stage, you can have statuses like "Backlog," "Urgent," or "Upcoming."

3. Task management

ClickUp provides a comprehensive task management system, allowing you to create, assign and track tasks effortlessly. Use ClickUp's priority and labeling features to ensure tasks are organized and easily identifiable.

4. Track progress

Monitor the progress of tasks by updating their statuses as they move through the workflow stages. This provides a clear overview of the project's status at any given time.

5. Reporting

ClickUp's reporting features allow you to track your team's progress and identify areas where you can improve. You can create custom reports or use one of ClickUp's pre-built reports.

6. Custom work views

With over 15 custom work views available, including Board view, Gantt chart view, and Workload view, users can tailor their project management approach to their unique workflows and personal preferences.

Clickup project management FA‎Qs

Is ClickUp used for project management?

Yes, ClickUp's wide range of features make it a popular choice for project managers:

  • Users can track and report on project progress.
  • Collaboration with team members is easy.
  • Effective organization of documents.
  • Features include sprint management, kanban boards, whiteboards, and collaborative documents.
  • ClickUp's AI tool provides over 100 customizable templated prompts.

Is ClickUp project management free?

Yes, ClickUp offers a free version of its project management software.

  • The free plan includes unlimited tasks, unlimited users, and 100MB of storage.
  • Paid plans start at $5 per user per month.
  • The paid plans include features like time tracking, custom fields and integrations with other tools.

How do I use ClickUp for a project?

To use ClickUp for a project, start by creating a workspace and then add your team members. You can then create tasks, assign them to team members, and set due dates. ClickUp also allows you to create custom statuses, set priorities, and track progress using various views such as lists, boards and timelines.

What are the alternatives to ClickUp project management?

If you're looking for alternatives to ClickUp project management, here are three popular options:

  • Trello offers a simple and intuitive interface for managing projects and tasks.
  • Asana provides a comprehensive set of features for project management, including task tracking, team collaboration, and reporting.
  • Monday.com is another alternative that offers customizable workflows and integrations with various tools.

Co‎nclusion

From customizable workflows to real-time collaboration, ClickUp has everything you need to stay organized and achieve project success. By following the step-by-step guide outlined in this blog post, you'll be well on your way to mastering ClickUp for effective project management.

With Scribe and ClickUp, you can streamline your project management, create project documentation in seconds, and boost productivity and efficiency. So why wait? Sign up for Scribe today and take your project management to the next level!

Ready to try Scribe?

Scribe automatically generates how-to guides and serves them to your team when they need them most. Save time, stay focused, help others.