
Introduction
Jump to...
- What is GitHub?
- What is a GitHub Wiki?
- How to create a GitHub Wiki
- What are the features of GitHub Wiki?
- What are the benefits of a GitHub Wiki?
- Why use Scribe to build your GitHub Wiki documentation?
- Best practices for your GitHub Wiki
GitHub Wiki is a powerful tool for creating and maintaining project documentation.
Whether you want to provide instructions, share knowledge or collaborate with others, a GitHub Wiki is a valuable addition to your knowledge arsenal.
This step-by-step playbook walks you through the process of creating a GitHub Wiki.
Playbook: GitHub Wiki
- GitHub Wiki is a powerful tool for creating and maintaining documentation for your projects.
- GitHub Wiki offers features like version control, collaboration and access control for efficient documentation management.
- This step-by-step guide walks you through the process of creating a GitHub Wiki.
- Use Scribe to quickly build visual step-by-step guides for your project documentation.
What is GitHub?
GitHub is a cloud-based hosting service that helps developers store and manage their code and track and control changes to their code. It's built on top of Git, a distributed version control system.
With GitHub, developers can easily contribute to projects, review code, manage issues and pull requests. It provides a centralized location for storing and sharing code, making it easier for developers to work together and maintain a history of changes.
If you're a beginner, see our GitHub 101: How to Use GitHub Like a Pro blog for tips on getting started.
What is a GitHub Wiki?
A GitHub Wiki is a knowledge base that's attached to a GitHub repository. It's a great way to document your project, share information with other contributors and create a community around your work.
Use tools like Scribe to quickly build visual step-by-step guides for your project documentation, then embed them in your GitHub Wiki.
A GitHub wiki can be used for a variety of purposes, including:
- Project documentation: Create pages on topics such as how to use your project, how it works and its features.
- Collaboration: GitHub Wikis are collaborative, so you can easily share information with other contributors and work on the wiki together.
- Community: Create a community around your project, where users can comment on pages and ask questions.
- Creating tutorials: Create tutorials on how to use your project, solve common problems or contribute to your project.
- Writing blog posts: You can use a GitHub Wiki to write blog posts about your project, your team or your industry.
- Creating a knowledge base: You can use a GitHub Wiki to create a knowledge base for your team or company.


How to create a GitHub Wiki
Here's the step-by-step playbook on how to create your GitHub Wiki.
Step 1: Access your repository
To create a GitHub Wiki, you need to have a repository on GitHub. Navigate to an existing repository where you want to add the Wiki. Or, if you don't have one yet, create a new repository.

1. Log in to your GitHub account.
2. Click on the "+" sign in the upper-right corner of the GitHub homepage and select "New repository."
3. Fill in the repository name, description, visibility (public or private), and other settings as needed.
4. Click the "Create repository" button.
Step 2: Enable the Wiki feature
Once your repository is set up, navigate to the repository's main page.
1. Click on the "Wiki" tab near the top.
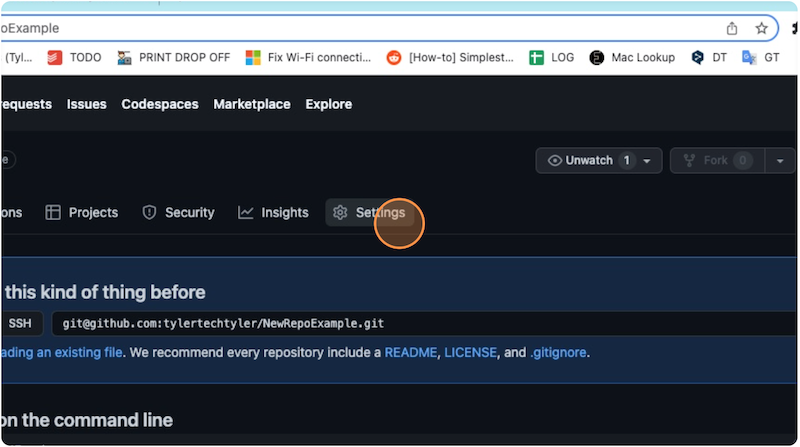
2. Click on the "Settings" tab at the top-right corner of the page.
3. Scroll down to the "Features" section and find the "Wiki" option.
4. Enable the Wiki feature by checking the box next to it.
Step 3: Add a README file
When you create a new GitHub repository, it's a good practice to include a README file from the start. This README can be an introduction to your project, outlining its purpose and how to get started.
1. In your local development environment, create a text file named README.md. The .md extension stands for Markdown, which allows you to format your README document.
2. Open the README.md file in a text editor or Markdown editor of your choice.
3. Add content to your README file. This content typically includes:
- Project title.
- Brief project description.
- Installation instructions.
- Usage examples.
- Features or functionalities.
- Configuration options.
- Contributing guidelines.
- Licensing information.
- Contact information.
4. You can format the content using Markdown syntax to make it more readable and organized.
5. Save your changes to the README.md file in your text editor.
6. Open a command-line terminal, navigate to your project's repository directory, and commit the README file to your Git repository. Here are the commands to use:
git add README.md  # Stage the README file for commit
git commit -m "Add README.md"  # Commit the changes with a descriptive message
git push  # Push the changes to your GitHub repository
7. Visit your GitHub repository's main page in your web browser.
8. You should now see the README.md file listed at the root of your repository. Click on it to view its content.
9. GitHub will automatically render the Markdown content, making it visually appealing and easy to read.
Step 4: Create the Wiki
After enabling the Wiki feature, a new tab labeled "Wiki" will appear next to the "Code" tab. Click on the "Wiki" tab to access your Wiki.
- By default, GitHub Wiki provides a "Home" page.
- GitHub Wiki uses Markdown for formatting, so you can create pages using Markdown syntax.
- Click the "Create the first page" link or edit the existing page to start adding content.
Step 5: Add and format pages
To create a new page, click on the "New Page" button located on the right side of the Wiki page.
- Give your page a title and start adding content using Markdown syntax.
- You can add text, headings, lists, links, images and more using Markdown. GitHub Wiki's editor provides a preview so you can see how your content will appear.
- To create new pages, you can use double square brackets around a page name to create a link that leads to a new page. For example,
[[New Page]]will create a link to a new page with the title "New Page." - When you click on the link, GitHub will prompt you to create a new page.
Step 6: Build project documentation for your Wiki
Download Scribe to create IT process guides. Scribe uses AI to capture your screen and create visual IT documentation with text and annotated screenshots.
You can build your project documentation by:
- Generating documentation from scratch using Scribe's generative AI tools.
- Create documentation with one of the pre-built templates in Scribe's extensive page templates library.
- Use Scribe's AI-powered tools to build your documentation.
Here are a few resources to get you started:
- IT Documentation Template
- Product Training Template
- Software User Manual Template
- Troubleshooting Guide Template
- IT Documentation Generator
- Quick Reference Guide Generator
- Software Process Generator
- GitHub Tutorial Generator
To start, install Scribe and follow the steps below:
1. Go to the process you want to document or troubleshoot.
2. Click the Scribe icon on your Chrome toolbar.
3. Click the "Start Capture" button. Scribe will automatically capture screenshots and text as you navigate through the process.
4. Once you have completed the process, click the "Stop Recording" button. In seconds, Scribe auto-generates detailed step-by-step documentation based on your keystrokes and clicks, complete with annotated screenshots.
5. Review your documentation for accuracy and make any necessary modifications to provide additional information or clarify steps.
6. Personalize your documentation by including helpful tips, updating steps and adding notes to the screenshots. You can even combine multiple documents with text and video elements to create a comprehensive resource.
7. Use Scribe's ChatGPT to add titles, descriptions and additional context.
8. When your document is finished, you're ready to add your Scribe to GitHub Wiki. There are two ways you can do this:
If you're a Scribe Pro user:
1. Click "Share" and then the "Export" tab.
2. Click "Export as Markdown".
3. Click "Copy to Clipboard".
4. Go to the repository where your wiki is stored.
5. Paste the Markdown code into the 3rd party tool.
If you're a Scribe Basic user:
1. Click "Share" and then "Embed".
2. Select the size you'd like and then Click "Copy Embed Snippet" to copy the code.
3. Go to the repository where your wiki is stored.
4. Click the Wiki tab.
5. Click the Edit button on the wiki page where you want to embed the code snippet.
6. In the Markdown editor, type the following code:
```code
[language]
your code snippet
Replace "[language]" with the programming language of the code snippet. For example, if you are embedding a Python code snippet, you would replace "[language]" with "python".
5. Save the wiki page. GitHub will automatically render the Scribe code snippet in a code block.
Step 7: Edit pages
To edit an existing page:
1. Navigate to the page you want to modify.
2. Click on the "Edit" button at the page's top-right corner.
3. Make the necessary changes using Markdown syntax
4. Save your edits.
Step 8: Commit changes
After making edits or adding new content, scroll down to the bottom of the editing page.
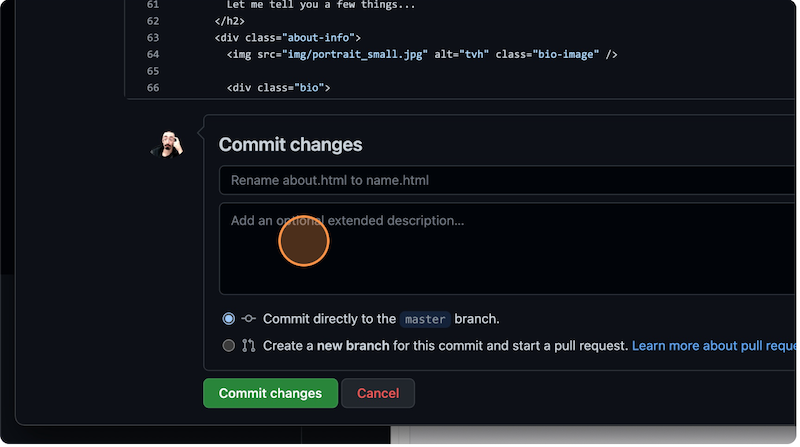
1. You'll see a section where you can add a commit message.
2. Provide a brief description of the changes you made.
3. Choose whether to commit your changes directly to the master branch or create a new branch for the changes. Typically, it's a good practice to create a new branch for major edits or new content.
4. Click the "Commit changes" button to save your edits.
Step 9: Organize pages
To organize your Wiki, you can create nested folders and subpages. To create a folder, simply add a forward slash ("/") in the page title.
For example, if you want to create a folder named "Tutorials" with a subpage named "Getting Started," you can title the page "Tutorials/Getting Started".
You can also create a table of contents page or use a sidebar for navigation.
Step 10: Customize the Wiki
GitHub Wiki provides customization options to enhance the appearance and functionality of your documentation. You can add a custom sidebar, create templates and even enable a Table of Contents for easy navigation.
To add a table of contents:
1. Go to the Wiki page where you want to add the table of contents.
2. In the Markdown editor, type the following code:
This will tell GitHub to insert a table of contents at this point in the page.
3. Under the "Table of Contents" section, manually create links to the headings or sections within your Wiki page. You can use Markdown anchor tags to link to specific sections within the same page. Here's an example:
- [Section 1](#section-1)
- [Section 2](#section-2)
- [Section 3](#section-3)
4. Within the content of your Wiki page, add anchors to the headings or sections you want to link to in the table of contents. To create an anchor, use the following format:
Repeat this process for each section you want to include in the table of contents.
5. Save the page. GitHub will automatically generate a table of contents based on the headings in the page.
6. Scroll back up to the "Table of Contents" section and test the links to ensure they navigate to the correct sections within your Wiki page.
You can also customize the table of contents by adding additional options to the tag. For example, you can specify the depth of headings to include in the table of contents, or you can style the table of contents using CSS.
Here's an example of a tag with additional options:
This tag will generate a table of contents that includes all headings up to level 3, and the table of contents will be indented by 20 pixels.
Step 11: Version control and history
Similar to code repositories, GitHub Wiki also maintains a version history. You can view the revision history of a page, compare changes and revert to previous versions if needed. This feature ensures that your documentation remains accurate and up-to-date.
Step 12: Invite collaborators
GitHub Wiki allows multiple contributors to work on your documentation.

To invite collaborators:
1. Go to the "Settings" tab of your repository and click on the "Manage Access" option.
2. Click on "Collaborators" and add the GitHub usernames of the people you want to collaborate with.
3. Assign the appropriate permissions.
Step 13: Sharing and access control
By default, your GitHub Wiki is publicly accessible. However, if you want to restrict access, you can change the repository settings to make it private or grant access only to specific users or teams.
1. Go to the repository where your wiki is stored.
2. Click the Settings tab.
3. Under the Wiki section, click the "Manage Access" button.
4. Select the sharing and access control settings that you want.
Congratulations! You have successfully created a GitHub Wiki for your repository.
What are the features of GitHub Wiki?
Let's explore some of the project documentation features in a GitHub Wiki:
- User-friendly editing: GitHub Wiki provides a straightforward and user-friendly interface for editing content, even for those who aren't experienced in coding.
- Version control: All changes made to your Wiki are versioned, allowing you to track modifications, revert to previous versions and maintain an update history.
- Collaboration: Multiple contributors can collaborate on the wiki simultaneously, making it a collaborative space for knowledge sharing and documentation.
- Markdown support: GitHub Wiki supports Markdown, making it easy to format text, add images, create links, and structure your documentation.
- Access control: You can control who can edit and view your Wiki, ensuring that sensitive information remains secure.
What are the benefits of a GitHub Wiki?
- Centralized documentation: GitHub Wiki serves as a central hub for all your project documentation, making it easily accessible to team members and external collaborators.
- Improved communication: Clear and up-to-date documentation helps improve communication within your team and with the open-source community.
- Enhanced productivity: With easy access to information, team members can work more efficiently, reducing the time spent searching for answers or clarifications.
- Open collaboration: GitHub Wiki promotes open collaboration and knowledge sharing, enabling your project to grow with contributions from the community.
Why use Scribe to build your GitHub Wiki documentation?

Scribe is a process documentation tool that can be used to create a variety of docs for your GitHub Wiki. Scribe has a number of advantages over traditional methods of creating documentation, including:
- Save time: As you work, Scribe captures your screen and turns workflows into step-by-step documentation in seconds—saving time on creating long or complex guides. Each Scribe follows a standard format you can customize according to your needs.
- User-friendly interface: Scribe offers an intuitive and user-friendly interface that makes it easy for anyone to create and manage If your team includes less technical contributors, Scribe offers a more user-friendly experience compared to editing raw Markdown files in a GitHub Wiki.
- Personalized documentation: All screenshots taken with Scribe are based on your keystrokes and clicks. Each Scribe can be customized according to your needs. Edit, annotate and highlight specific areas to make your document accurate, relevant and visually engaging.
- Templates: Scribe's pre-designed templates for various types of documentation (user guides, troubleshooting, FAQs, etc.), make it quicker to start and ensure consistent formatting.
- Flexible export options: With Scribe, you can generate documentation in a variety of formats, including Smart Embed, URLs, Markdown, HTML, and PDF, so you can choose the format that is best suited for your needs.
Best practices for your GitHub Wiki
The timing for adding documentation to your GitHub Wiki can vary depending on your project's stage and goals. Here are some guidelines:
- Start early: It's a good practice to begin adding documentation to your GitHub Wiki as soon as your project starts taking shape. Start with creating a basic structure with placeholders for different sections of your documentation.
- Initial project setup: As you set up your project and repository on GitHub, create the Wiki and populate it with foundational information, including an overview of the project, its goals and basic installation instructions.
- Key features and functionality: When you've implemented core features or functionalities of your project, use Scribe's Feature Release Template to document them in the Wiki.
- User guides: If your project is user-facing, create user guides or tutorials as early as possible. Use Scribe's Software User Guide Template to provide clear and comprehensive instructions on how to use your software product.
- Developer documentation: For projects that involve development or coding, start documenting APIs, coding conventions and development workflows early. This will make it easier for contributors to understand your project and get involved.
- Continuous updates: Each time you make significant changes or add new features, update your documentation to reflect those changes.
- Release documentation: When you make official releases of your project, use Scribe's Product Release Note Generator to include documentation specific to each release.
- Community contributions: If you have community contributors, encourage them to contribute to your documentation.
- Troubleshooting and FAQs: As users encounter common issues or ask frequently asked questions (FAQs), use Scribe to add a troubleshooting guide to the FAQs in your Wiki to assist them. Create fast and easy FAQ guides with Scribe's FAQ Response Generator.
- Collaboration with contributors: If you have a growing community of contributors, work collaboratively with them to improve and expand your documentation.
Conclusion
Creating a GitHub Wiki can greatly benefit your project by providing clear instructions, reducing support requests and fostering collaboration.
Use Scribe with your GitHub Wiki to create visual documentation that will help you share your GitHub projects and get feedback from other developers.
Sign up today to create your first Scribe!


