
Introduction
In today's digital age, good communication and teamwork include using annotated screenshots to explain and emphasize information.
Annotated screenshots add visual cues, highlight specific areas and provide context, making it easier for others to understand your message.
In this post, we'll provide a step-by-step guide on how to annotate screenshots on Windows, Mac, iPhone and Android phone.
TL;DR: How to annotate a screenshot
- Annotated screenshots add visual cues, highlight specific areas and provide context, making it easier for others to understand your message.
- Screenshot annotation is important for visual clarity, emphasis, context, details, and streamlined collaboration.
- There are multiple kinds of annotations that can be added to a screenshot, beyond text boxes and basic shapes.
- Windows and Mac platforms have built-in tools for annotating screenshots.
- You can also annotate screenshots on iPhone and Android phones.
- Tools like Scribe offer a faster and easier way to annotate screenshots.
What is screenshot annotation?
Annotation refers to a "note of explanation or comment added to a text or diagram" added by editing a screenshot.
Screenshot or image annotation is adding labels or comments on a screenshot to give more information or emphasize an area.
Why is screenshot annotation important?
Including screenshots in your content, help guides or how-to guides can be useful. But sometimes screenshots aren't enough.
Screenshot annotation comes in handy in a few ways:
- Visual clarity: Draw attention to specific elements in a screenshot, guiding viewers to important details.
- Emphasis: Point out the important parts of a screenshot.
- Context: Add contextual information that explains the purpose or highlights specific areas.
- Details: Explain a particular part or the whole screenshot image for accuracy.
- Streamline collaboration: Eliminate lengthy explanations and reduce the chances of misunderstanding.
💡How to Create Visual Work Instructions (+ Examples)
{{banner-short-v2="/banner-ads"}}
What annotations should I add to my screenshots?
There are multiple kinds of annotations that can be added to a screenshot, beyond text boxes and basic shapes:
- Add a text block on a screenshot image, with instructions or details.
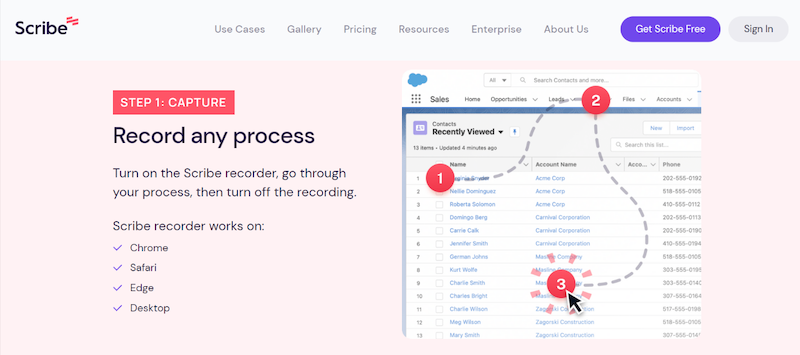
- Add an arrow to highlight the important information.
- If the screenshot has multiple steps (or clicks) on the same screenshot, you can add multiple arrows with numbers to show the sequence.
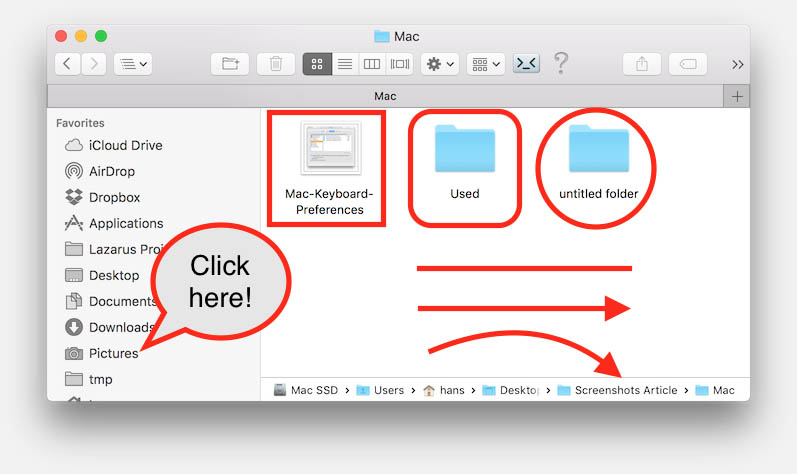
- Add a circle or square around the section you want to emphasize. You can also combine the squares with arrows or sequence arrows.
- Color-code different elements in the screenshot to sort or emphasize them. For example, use red to show elements that need to be fixed, blue for new elements, green for accepted elements, etc.
- If you're annotating a screenshot with sensitive information, blur screenshot details to avoid privacy or security issues.
- Use emoji icons to visually represent reactions, priorities or statuses in a fun, visual way.
How to annotate a screenshot using the Windows Snipping Tool
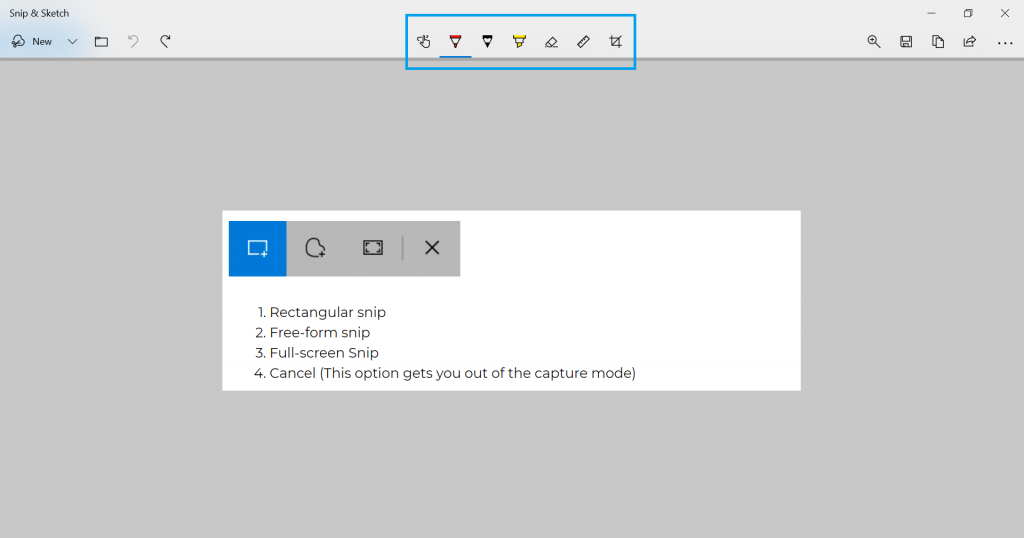
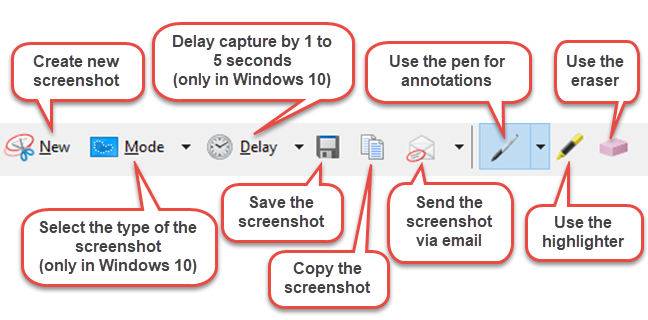
The Windows Snipping Tool (Snip and Sketch) is a built-in screen-capturing utility for taking screenshots/snapshots. It includes four options for capturing screenshots:
- Free-form snip: Draw a free-form shape around an object.
- Rectangular snip: Drag the cursor around an object to form a rectangle.
- Window snip: Select a window that you want to capture, such as a dialog box.
- Full-screen snip: Capture the entire screen.
📌 Best Free Screenshot Software for Windows
Keyboard shortcuts for annotating screenshots on Windows
Here's a quick list of keyboard shortcuts or hotkeys you can refer to when annotating your screenshots.
- Press the Windows key + Shift + S to capture a screenshot. This will save the screenshot to your clipboard.
- Press Ctrl + V to paste the screenshot.
- Press B to draw a box, L to add a line, and T to add text.
- Save the screenshot by pressing Ctrl + S.
Here are the steps to annotate a screenshot using the Windows Snipping Tool:
Step 1: Capture the screenshot using Snip & Sketch
- Press the Windows key.
- Type Snip & Sketch.
- Select "Open" or press the Enter key to launch the Snip & Sketch tool.
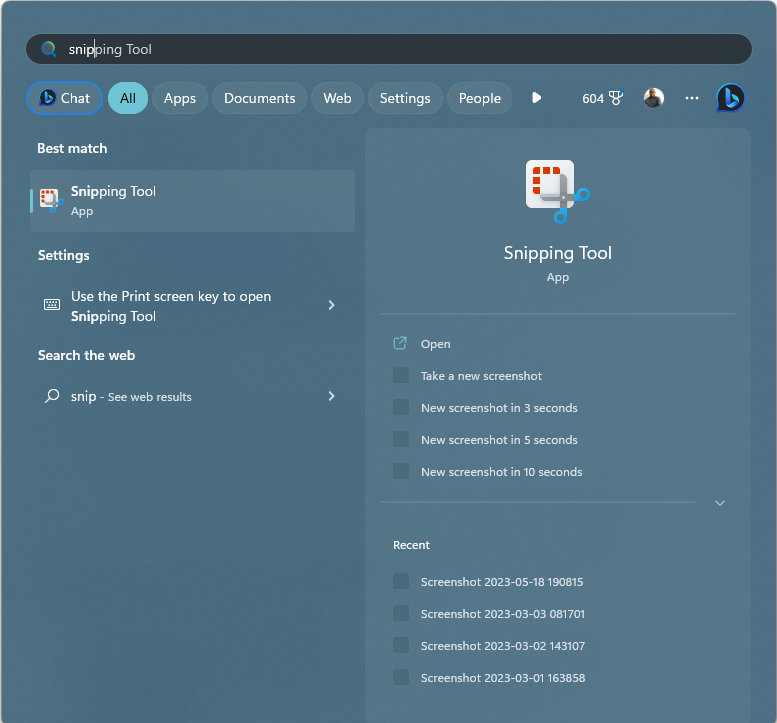
You can also quickly open the Snipping Tool by pressing Windows + Shift + S hotkey or press the print screen function key.
- Once you've opened the tool, you'll see its screenshot toolbar appear. Select one of the four options and take a screenshot on Windows.
- A screenshot notification will appear on your desktop or notifications.
🎓 Here's how to use the ''print screen'' function for screenshots
Step 2: Open the screenshot
Click anywhere on that screenshot notification to open the Snipping Tool window.
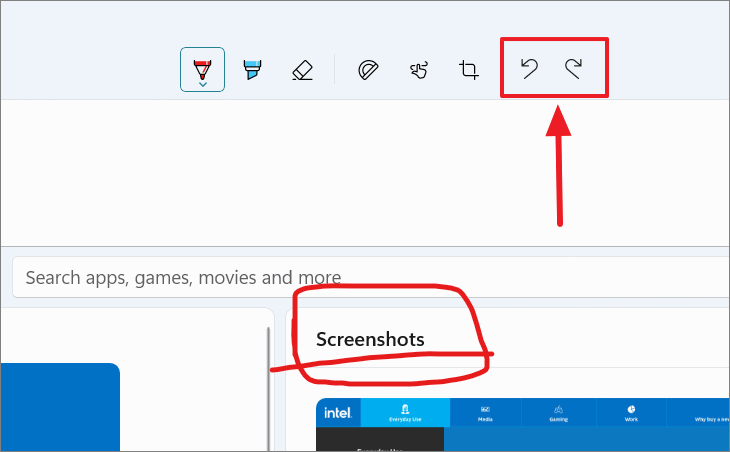
Step 3: Add screenshot annotations in snip & sketch
The Snip & Sketch tool bundles three annotation tools (Pen, Pencil and Highlighter) by default.
Use any other theme to annotate the screenshot.
- Click on the ballpoint pen icon (highlighter or pencil) to write on the screenshot.
- Select the ballpoint pen icon again to change the color of the annotation stroke.
- Adjust the slider to increase or decrease the stroke's thickness.
Tips:
- Use the ruler tool to draw a straight line.
- The protractor will draw a circle or semicircle.
- Rotate the ruler or protractor using your mouse's scroll wheel or two fingers on the trackpad.
- Remove any annotations with the eraser.
Step 4: Save and share
Once you have finished annotating a screenshot save it to your PC.
The Snipping Tool also allows you to share the annotated screenshot via email, messaging apps or any other preferred method.
📌 12 Free Alternatives to Snipping Tool in Chrome
How to annotate a screenshot using Microsoft Paint
Here are the steps to annotate a screenshot with Microsoft Paint:
- Click Windows Start and type Microsoft Paint.
- Select Paint.
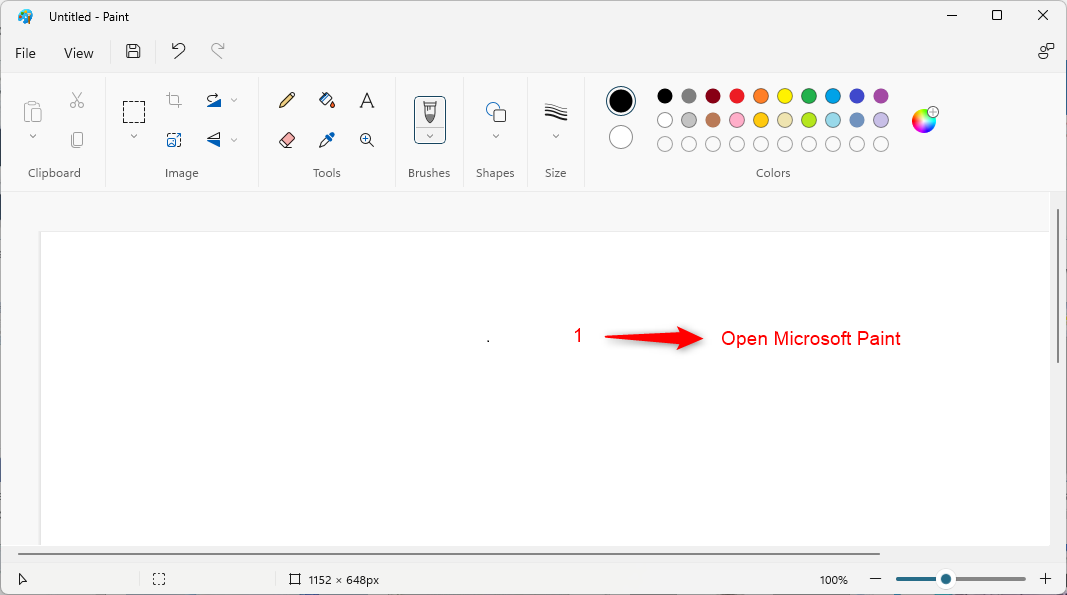
- Once MS Paint opens, go to File and select the Open option.

- Select a screenshot image and press the Open button.
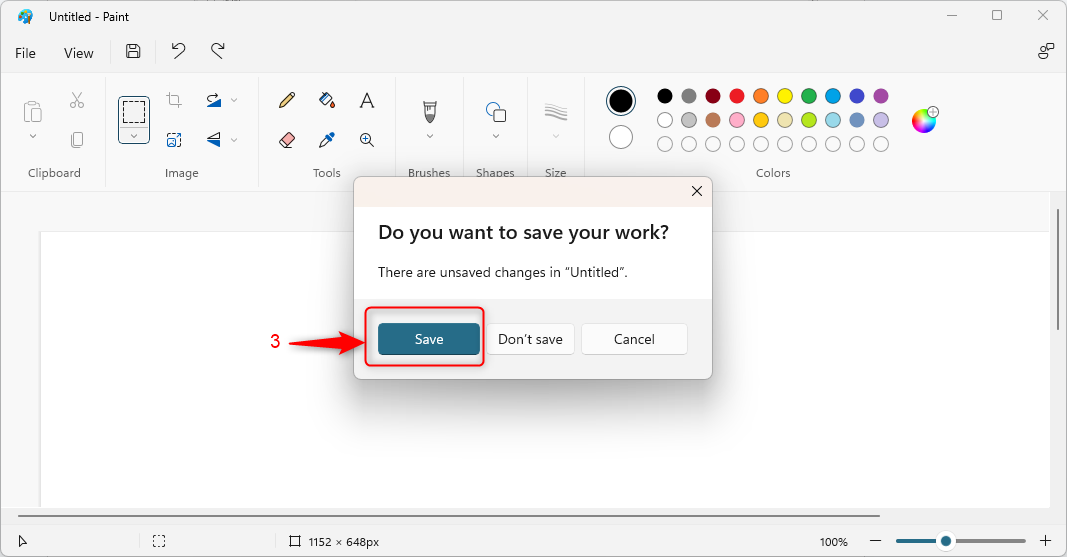
- Select to save your work before you get started.
- Use the MS Paint menu to do any of the following:
- Use the Brushes button to select a color and write on the image.

- Select the Marker option to highlight areas in the screenshot.
- Choose a color from Pinot's palette.
- To add a shape, hold the left mouse button over the image and drag the cursor right or left to expand or shrink the shape.
- Add text notes to your screenshot by clicking the A button. Click anywhere on the image to place the text box, then type your text. Add font and size options.
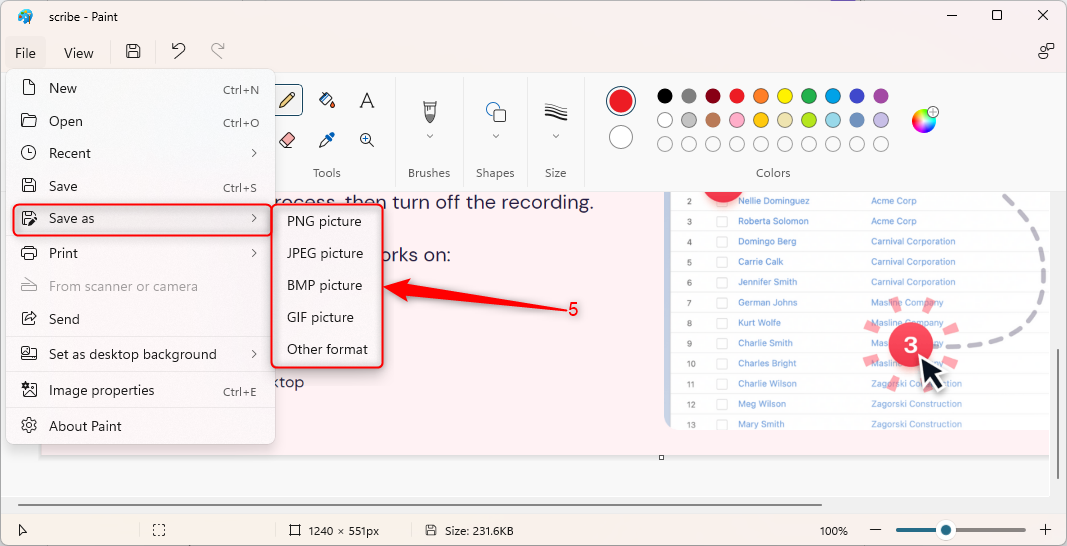
- Save your screenshot annotation (File > Save As > Save).
How to annotate a screenshot on a Mac
Macs also offer native tools for annotating screenshots through the Preview tool. Here's a step-by-step guide to annotating screenshots on a Mac:
Step 1: Capture the Screenshot
On a Mac, capture a screenshot using keyboard shortcuts.
- Press Shift + Command + 3 to capture the entire screen.
- Press Shift + Command + 4 to draw a selected area to capture.
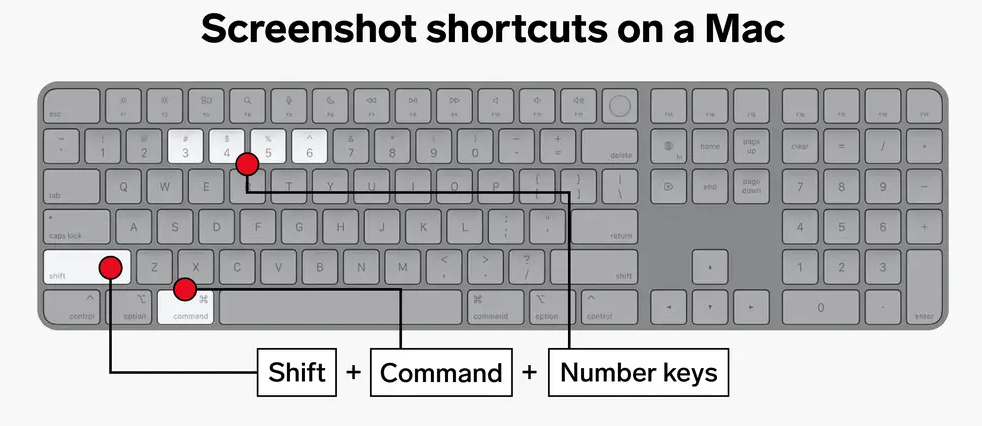
- Press Shift + Command + 5 (or use Launchpad) to open Screenshot and see all of the capturing and recording tools.
Step 2: Annotate with Preview
Open the screenshot in the Preview app, the default image viewer on Mac.
Click on the "Show Markup Toolbar" button, which looks like a toolbox icon, to reveal the annotation tools.
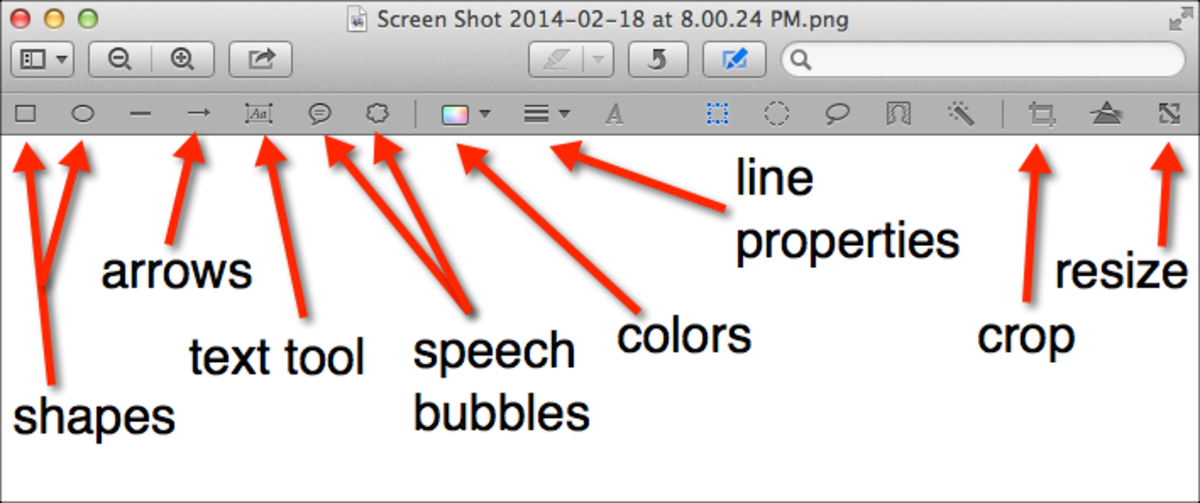
Step 3: Use annotation tools
The Markup Toolbar offers annotation choices like text, shapes, lines, arrows and highlighting tools. Some of the built-in Mac annotation features available on Mac include:
- Rectangular selection: Rectangular, Elliptical, Lasso or Smart Lasso Selection.
- Instant alpha: Remove the background from a screenshot image.
- Sketch: Use a single stroke to sketch a shape.
- Draw: Draw a shape using a single stroke. Press your finger firmly on the trackpad to draw a darker, heavier line.
- Shapes: Click a shape on the markup, then drag it where you want. You can resize it and use the green handles to change the shape.
- Text: Write/type your text in the text box, then drag it to where you want.
- Image description: Enter, edit or view a description of an image.
- Annotate: Sketch or draw on the screenshot using your nearby iPhone or iPad.
A few other things you can do:
- Sign.
- Adjust the color.
- Adjust the size, shape and style.
- Add a border or fill color.
- Change the text style.
- Crop the screenshot.
🎓 Here's how to crop screenshots on your Mac
Step 4: Save and share
After annotating the screenshot, save it. You can then share it through email, messaging apps or any other preferred method.
How to annotate a screenshot on an iPhone or Android phone
If you want to annotate a screenshot on mobile, follow these steps.
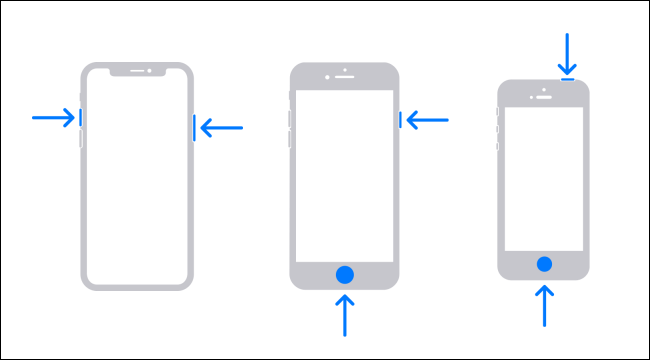
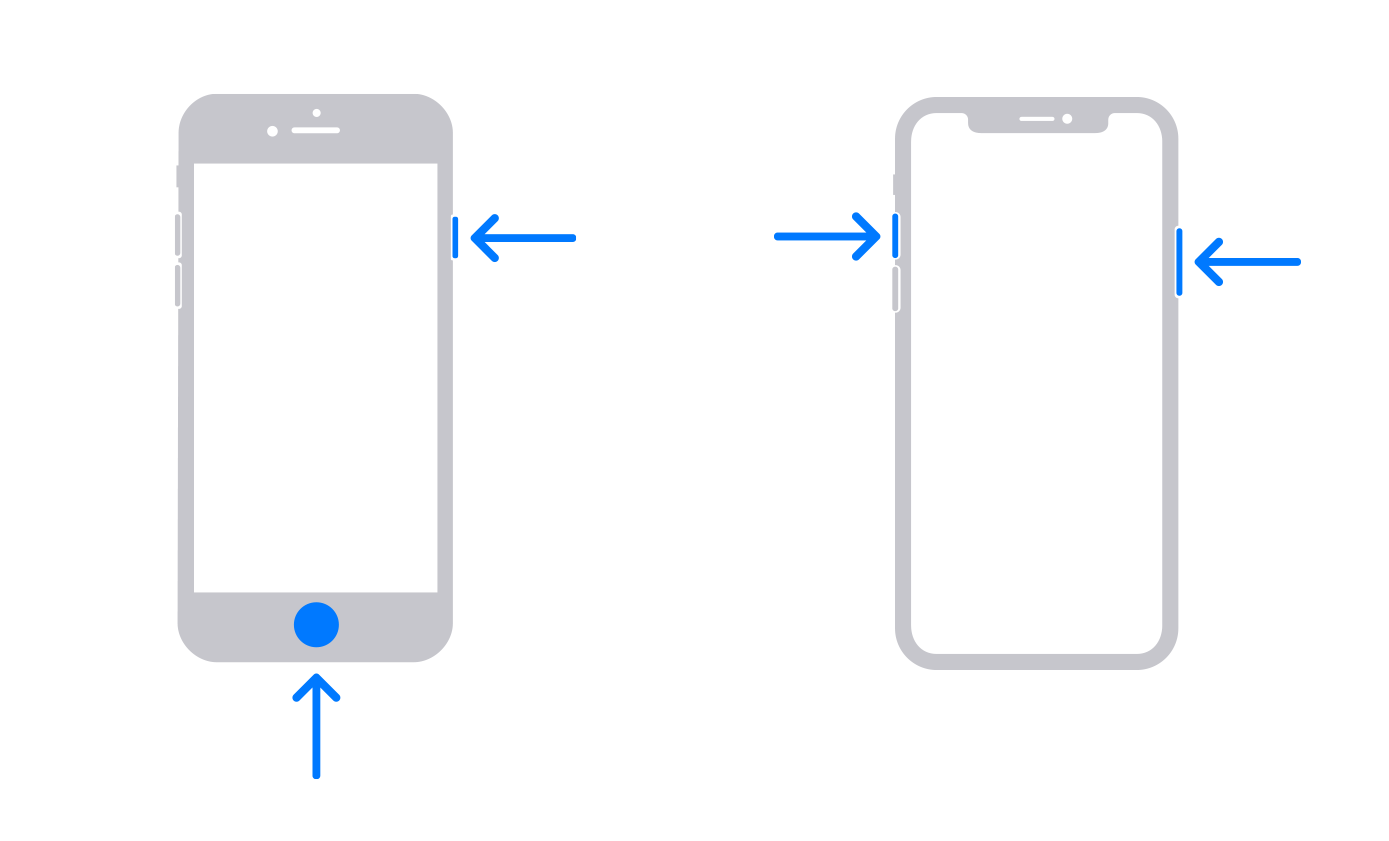
1. Take a screenshot on your phone.
- On an iPhone, press the power and volume down keys at the same time.
- On an Android, press the power and volume up/down keys at the same time.
2. Open your phone's photo editing app, choose the screenshot photo, and press the "edit" or "annotation" option.
3. Select a drawing tool (pen, arrow or text box) and choose a color for your annotations if needed.
4. Add your annotations by drawing, adding text boxes, or pointing with arrows.
5. Save the edited screenshot.
How to annotate a screenshot automatically with Scribe

If all of this sounds like it's a lot of work, you're right. With Scribe, you can quickly and easily annotate your screenshots:
https://scribehow.com/shared/How_to_Annotate_your_Scribes_Screenshots__gjx9ZvsZSv6ALBYpSeqypQ
Scribe, powered by ChatGPT, is the fastest, easiest and most effective way to share how to do any process.
@nachitojohnson This is awesome!! #scribehow #productivityhack #business #work #lifehack #fyp #foryou ♬ Sunroof - Nicky Youre & dazy
Scribe captures your process while you work and automatically generates how-to guides complete with screenshots, annotations and clicks in four steps:
- Turn on the screen recorder (Scribe extension).
- Record any process.
- Your step-by-step guide is automatically generated.
- Add edits, screenshot annotations and customization.
- Share your process guide with one click (URL, export as PDF, Embed on wikis and tools, copy into a document).
By capturing your process while you work, Scribe automatically generates a visual guide ready to share with the team at a click of a button.
1. ScribeHow [@ScribeHow]
Covert screen recording to a tutorial automatically.
• Click record
• Do the thing you want to show someone
• Get a beautiful auto-generated guide
No manual screenshots. Scribe does it for you.
🔗 https://t.co/nkamSc0MoD pic.twitter.com/pC4g1S4NTQ
— Pratham (@Prathkum) January 9, 2023
Scribe automates screen recording and generates how-to guides, which helps save time and effort. You can document your processes 15x faster.
Screenshot Annotation FAQs
Are there any third-party annotation tools available for Windows and Mac?
Several third-party annotation tools are available for both Windows and Mac platforms. Some popular options include Scribe, Snagit and Greenshot.
Can I undo or edit annotations after saving the screenshot?
This depends on the tool. Some applications, like Microsoft Paint and macOS Preview, allow you to undo or edit annotations even after saving the screenshot.
Can I annotate screenshots in different file formats?
You can annotate screenshots in various file formats, such as PDF, PNG or JPEG. The annotation tools on Windows and Mac platforms work well with these common image formats.
What are the best practices for saving and organizing annotated screenshots?
Save screenshots with descriptive filenames that include the date and a brief description of the content or purpose.
For example, "2019-10-15 Product Roadmap Update.png".
Save screenshots in a dedicated "Screenshots" folder for easy access.
Organize screenshots in subfolders by topic, project, client, product area—or whatever categories fit your needs. For example, "Client X/Product Roadmaps" or "2024 Planning/Q1 Initiatives".
Consistent naming and organizing will make it easy to find screenshots when needed.
Increase your productivity with annotated screenshots
Annotating screenshots is a valuable skill that enhances communication and collaboration by providing visual cues and context.
Ready to take your screenshots to the next level? Scribe is the fastest, easiest and most effective way to share how to do any process.
With Scribe, guides are ready to share instantly or can be added to any tool. Try Scribe now.


