How to Crop Screenshots on Your Mac

Learn how to crop screenshots on your Mac with these simple steps.
By
Rahul Roy
9
min read
Updated
October 30, 2024
Photo credit
Create visual guides free

Though we don't talk about it enough, screenshots are a major tool that can help us professionally and personally. A quick screenshot of a presentation, document, or any other file for sharing and communication is a majorly overlooked advantage that we rarely talk about. 

So for all Mac users, let's dive into how to take a screenshot, crop, and edit it all in this blog.

We'll also tell you about this new tool, Scribe, that can help facilitate these actions for you in a that's fast, easy and visually stunning.  

How to take a screenshot on Mac

Mac users have additional options when it comes to creating screenshots with the arrival of macOS Mojave.

Taking screenshots is now as easy as hitting Command + Shift + 5 or going to:

  1. Launchpad.
  2. Other.
  3. Screenshot.

You can take screenshots, edit them and save them to your computer all from the same window.

You can select an area of the screen to capture, the full screen, or just one window.

You might record your full Mac screen or a selected region, set a timer to take screenshots or customize the default save location automatically.

Keyboard shortcuts are still available for the convenience of users. To take a screenshot of the full screen, use Command + Shift + 3.

How to crop a screenshot on Mac

Simply pressing Command + Shift + 4 will make the cursor become a crosshair, allowing you to select the exact area of the screen you wish to capture. Choose the area of the screen or browser you want to record.

You can take a snapshot of just one window by pressing Command + Shift + 5 (yep, that's the same key that brings up the screenshot tool). Then, press the space bar to toggle between taking a screenshot of the entire screen or a single window. To screen grab the Touch Bar on a Mac, hit Command + Shift + 6.

Now there’s an easy way to document and take screenshots with Scribe. With Scribe, you can quickly produce visual documentation for your team or yourself by simply capturing the step-by-step instructions online.

{{banner-short-v2="/banner-ads"}}

How to take & crop a screenshot on Mac? 

Many software available addresses the question of how to crop a screenshot on Windows and Mac. You can also use free snipping tools for Mac or Chrome snipping tools. However, today we will focus only on Mac. Mac already has an in-built screenshot method in the form of an app you may use.

But that's only for the latest versions — Catalina and Mojave. You can access this feature through the following command: Shift-Command-5. Here’s a step-by-step guide on how you can capture a screenshot on Mac:

How to capture a screenshot on Mac: How to Crop Screenshots on Mac

         
  • To capture a screenshot, press Shift-Command-5
  • A command bar with various options will appear.
  • Here are the actions you may perform from the standard bar: take a screenshot of a screen, a portion of your screen, or a window. 
  • The app also allows you to record the entire screen or a part of it. 
  • The “Options” drop-down menu lets you save your screenshot to the desired location.
  • Once you have decided on what to capture or have positioned your selection, click on the “Capture” option at the extreme right side of the command bar, and you are done!

To Mac's built-in screenshot application, third-party software choices offer additional capabilities. The Snagit program allows you to capture screenshots, crop them, add notes, create GIFs and more.

Now that was for users with the latest Mac versions. If, however, you are not on the newest version, here is what you need to do:

  • For capturing the entire screen: Shift-Command-3
  • For capturing a part of the screen: Shift-Command-4. You can then adjust the selection to your liking.
  • For capturing a specific window: Shift-Command-4 and then press the spacebar. Bring your cursor over the window you want to capture (it will highlight it for your ease), and click. 

Next is to know how to crop the screenshot. If you're using the Shift-Command-4 combination, you are already getting the option to crop and capture the part of the screen that you desire. If, however, you need further cropping or editing your screenshot, here's what you can do:
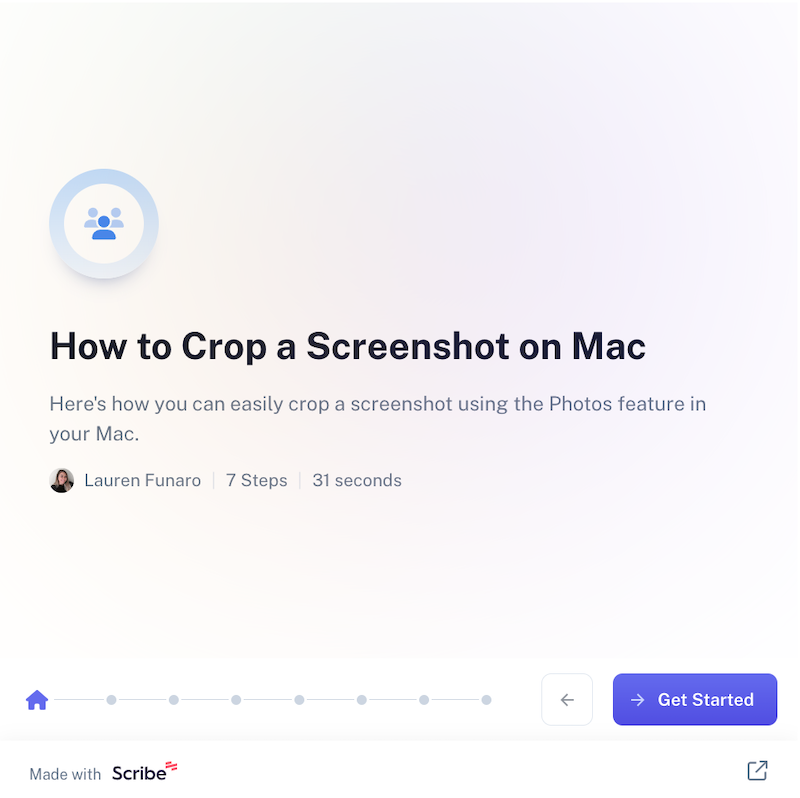
How to Crop Screenshots on Mac

         
  • Save your Screenshot to your Photos app.
  • Open the image by double-clicking on the app.
  • Hit the “Edit” toolbar.
  • Select the “Crop” option. 
  • Crop the screenshot as and how you like it.
  • You can save a copy of the screenshot by selecting the “Save As A Copy” option, where the original screenshot will stay as it is, and the cropped screenshot will be saved as a new picture. Or you may choose to alter the actual screenshot by selecting the “Save” option. 
  • If you are wondering how to send a screenshot, click the “Share” option and choose your preferred means of sharing the screenshot.

These are the various ways you can capture a screenshot and crop it on Mac. You will find multiple tools, such as Scribe, available that you can use for this particular activity and much more. 

How to make cropping & recording easier on Mac with Scribe

So far, we have discussed taking a screenshot, cropping it and saving it on Mac through its in-built apps and hotkeys. But if your purpose requires you to take screenshots daily for professional needs, why not shift to something more proficient and efficient? 

Let us tell you about Scribe, a unique and powerful process documentation application allowing you to record and capture your screens easily. But you may ask how that differs from the in-built features Mac already provides. 

Well, here is where things get interesting. Scribe takes your work to auto-generate step-by-step guides of your process, like the ones we shared above.

Now that is next-level documentation for you — and we're not the only ones to claim that. According to Daniel Owen, the team leader for Quality Assurance at Learning Pool: “Time savings is the most important thing for us… I can record 150 steps in five minutes with Scribe.” 

Just as Daniel explains, Scribe helps you save time and effort while being efficiently dynamic for all kinds of purposes.

You can make several how-to — plus annotated screenshots — without any hassle.

Once done, it allows you to share it, hence, promoting collaborative efforts effortlessly. 

Scribe is perfect for individuals who need to record processes regularly or take tons of screenshots to facilitate their work. Scribe is a highly recommended tool if you regularly build guides, strategies, and step-by-step documents. Let's discuss Scribe in more detail further. 

How to install Scribe on your device

First, we will take a look at how to get Scribe. Installing Scribe is a straightforward task. You get an application for it, and it is also available as a web extension for further use and ease.

Here's what you need to do to get Scribe on your Mac:

How to create step-by-step guides with Scribe: How to Crop Screenshots on Mac

         
  • Firstly, you need to visit the official website for Scribe. 
  • Once on the website, click the “Get Started” button and sign in. You can sign in using your Google or Apple ID if you want.
  • After completing the sign-in process, go to your workspace and head over to your dashboard. 
  • Once on the page, click on your initial icon. You will find this in the top-right-hand corner.
  • From the drop-down menu, select “Desktop App.”
  • A pop-up will appear asking you to choose between “Download for Mac” and “Download for Windows”.
  • Select “Download for Mac”. Your download will start. Follow the procedures, and you will have successfully installed Scribe on your device. 

As you can see, installing and getting started with Scribe is that easy. Now that you have installed Scribe, let us move forward with how to use Scribe to get the best out of it. 

Step-by-step guide on how to use Scribe 

If you see it this way, Scribe has bountiful scopes, and it is entirely up to you how you can make use of it. You can stick to the basics and create simple and informative guides or be creative with them and use them craftily. But for that, you first need to know the basics of it. So, today we will tell you how to use Scribe to make detailed step-by-step guides on your Mac.

Let’s get started!

Get started with Scribe: How to Crop Screenshots on Mac

         
  • Once you've downloaded the application, locate the Scribe icon in your top menu bar.
  • Click on it to get a drop-down option. Click “Start Recording” from there. 
  • Next is the easiest step — go about the process you want to record. Don’t worry if you make a mistake. You can always edit it later. 
  • Once you finish the process, click the “Stop” button, and you are done! You will find the “Stop Recording” option in the same place as the “Start Recording” option.
  • Once you're done with the recording, the software will create your how-to guide in your browser for you to edit it further and share it.  
  • And just like that, you have created yourself a new Scribe! Congratulations!

You can use Scribe as a desktop app (Pro) or Edge and Chrome screen capture extension. Here are the steps to make sure you have easy access to the extension:

  • Open your browser. We will take Chrome as an example here.
  • Next to your profile, you will find a puzzle icon. Click on it to find a dropdown menu.
  • From the menu, locate Scribe and click on the Pin icon. You have now successfully pinned the Scribe extension!
  • Next, you can click on the Scribe extension and start recording. Once you are done, click on “Stop Recording”, and you are done. It’s as easy as that! 

{{banner-default="/banner-ads"}}

Use Scribe Pages to take your screenshots to the next level

You might be thinking, Scribe sounds great, but:

  • “What if my process is multiple steps? Can I combine Scribes?” 
  • Can I send someone a collection of Scribes?” 
  • Can I add videos and links?” 

That's why we created Pages, visual documents that give you the flexibility to make process guides your own. Now you have even more options to capture, organize and share Scribes. With Pages comes the freedom to add:

  • Text and descriptions.
  • Multiple Scribes.
  • Hyperlinks.
  • Loom, Gong and Youtube videos

Here's a Page in action.

Getting started with Slack: How to Crop Screenshots on Mac


‎Get started with Scribe today

Scribe truly has the potential to achieve as much as its user can deem possible. So, it is up to you to use it best!

Here's what TikToker Conor Butkovik had to say about it:

‎So, what are you waiting for? Try Scribe for yourself today, and never go back to manual documentation again!

How to Crop Screenshots on Your Mac

By
Rahul Roy
March 22, 2023
9
min read
Updated
October 30, 2024
Photo credit
Learn how to crop screenshots on your Mac with these simple steps.
Create visual guides free


Introduction

Though we don't talk about it enough, screenshots are a major tool that can help us professionally and personally. A quick screenshot of a presentation, document, or any other file for sharing and communication is a majorly overlooked advantage that we rarely talk about. 

So for all Mac users, let's dive into how to take a screenshot, crop, and edit it all in this blog.

We'll also tell you about this new tool, Scribe, that can help facilitate these actions for you in a that's fast, easy and visually stunning.  

How to take a screenshot on Mac

Mac users have additional options when it comes to creating screenshots with the arrival of macOS Mojave.

Taking screenshots is now as easy as hitting Command + Shift + 5 or going to:

  1. Launchpad.
  2. Other.
  3. Screenshot.

You can take screenshots, edit them and save them to your computer all from the same window.

You can select an area of the screen to capture, the full screen, or just one window.

You might record your full Mac screen or a selected region, set a timer to take screenshots or customize the default save location automatically.

Keyboard shortcuts are still available for the convenience of users. To take a screenshot of the full screen, use Command + Shift + 3.

How to crop a screenshot on Mac

Simply pressing Command + Shift + 4 will make the cursor become a crosshair, allowing you to select the exact area of the screen you wish to capture. Choose the area of the screen or browser you want to record.

You can take a snapshot of just one window by pressing Command + Shift + 5 (yep, that's the same key that brings up the screenshot tool). Then, press the space bar to toggle between taking a screenshot of the entire screen or a single window. To screen grab the Touch Bar on a Mac, hit Command + Shift + 6.

Now there’s an easy way to document and take screenshots with Scribe. With Scribe, you can quickly produce visual documentation for your team or yourself by simply capturing the step-by-step instructions online.

{{banner-short-v2="/banner-ads"}}

How to take & crop a screenshot on Mac? 

Many software available addresses the question of how to crop a screenshot on Windows and Mac. You can also use free snipping tools for Mac or Chrome snipping tools. However, today we will focus only on Mac. Mac already has an in-built screenshot method in the form of an app you may use.

But that's only for the latest versions — Catalina and Mojave. You can access this feature through the following command: Shift-Command-5. Here’s a step-by-step guide on how you can capture a screenshot on Mac:

How to capture a screenshot on Mac: How to Crop Screenshots on Mac

         
  • To capture a screenshot, press Shift-Command-5
  • A command bar with various options will appear.
  • Here are the actions you may perform from the standard bar: take a screenshot of a screen, a portion of your screen, or a window. 
  • The app also allows you to record the entire screen or a part of it. 
  • The “Options” drop-down menu lets you save your screenshot to the desired location.
  • Once you have decided on what to capture or have positioned your selection, click on the “Capture” option at the extreme right side of the command bar, and you are done!

To Mac's built-in screenshot application, third-party software choices offer additional capabilities. The Snagit program allows you to capture screenshots, crop them, add notes, create GIFs and more.

Now that was for users with the latest Mac versions. If, however, you are not on the newest version, here is what you need to do:

  • For capturing the entire screen: Shift-Command-3
  • For capturing a part of the screen: Shift-Command-4. You can then adjust the selection to your liking.
  • For capturing a specific window: Shift-Command-4 and then press the spacebar. Bring your cursor over the window you want to capture (it will highlight it for your ease), and click. 

Next is to know how to crop the screenshot. If you're using the Shift-Command-4 combination, you are already getting the option to crop and capture the part of the screen that you desire. If, however, you need further cropping or editing your screenshot, here's what you can do:

How to Crop Screenshots on Mac

         
  • Save your Screenshot to your Photos app.
  • Open the image by double-clicking on the app.
  • Hit the “Edit” toolbar.
  • Select the “Crop” option. 
  • Crop the screenshot as and how you like it.
  • You can save a copy of the screenshot by selecting the “Save As A Copy” option, where the original screenshot will stay as it is, and the cropped screenshot will be saved as a new picture. Or you may choose to alter the actual screenshot by selecting the “Save” option. 
  • If you are wondering how to send a screenshot, click the “Share” option and choose your preferred means of sharing the screenshot.

These are the various ways you can capture a screenshot and crop it on Mac. You will find multiple tools, such as Scribe, available that you can use for this particular activity and much more. 

How to make cropping & recording easier on Mac with Scribe

So far, we have discussed taking a screenshot, cropping it and saving it on Mac through its in-built apps and hotkeys. But if your purpose requires you to take screenshots daily for professional needs, why not shift to something more proficient and efficient? 

Let us tell you about Scribe, a unique and powerful process documentation application allowing you to record and capture your screens easily. But you may ask how that differs from the in-built features Mac already provides. 

Well, here is where things get interesting. Scribe takes your work to auto-generate step-by-step guides of your process, like the ones we shared above.

Now that is next-level documentation for you — and we're not the only ones to claim that. According to Daniel Owen, the team leader for Quality Assurance at Learning Pool: “Time savings is the most important thing for us… I can record 150 steps in five minutes with Scribe.” 

Just as Daniel explains, Scribe helps you save time and effort while being efficiently dynamic for all kinds of purposes.

You can make several how-to — plus annotated screenshots — without any hassle.

Once done, it allows you to share it, hence, promoting collaborative efforts effortlessly. 

Scribe is perfect for individuals who need to record processes regularly or take tons of screenshots to facilitate their work. Scribe is a highly recommended tool if you regularly build guides, strategies, and step-by-step documents. Let's discuss Scribe in more detail further. 

How to install Scribe on your device

First, we will take a look at how to get Scribe. Installing Scribe is a straightforward task. You get an application for it, and it is also available as a web extension for further use and ease.

Here's what you need to do to get Scribe on your Mac:

How to create step-by-step guides with Scribe: How to Crop Screenshots on Mac

         
  • Firstly, you need to visit the official website for Scribe. 
  • Once on the website, click the “Get Started” button and sign in. You can sign in using your Google or Apple ID if you want.
  • After completing the sign-in process, go to your workspace and head over to your dashboard. 
  • Once on the page, click on your initial icon. You will find this in the top-right-hand corner.
  • From the drop-down menu, select “Desktop App.”
  • A pop-up will appear asking you to choose between “Download for Mac” and “Download for Windows”.
  • Select “Download for Mac”. Your download will start. Follow the procedures, and you will have successfully installed Scribe on your device. 

As you can see, installing and getting started with Scribe is that easy. Now that you have installed Scribe, let us move forward with how to use Scribe to get the best out of it. 

Step-by-step guide on how to use Scribe 

If you see it this way, Scribe has bountiful scopes, and it is entirely up to you how you can make use of it. You can stick to the basics and create simple and informative guides or be creative with them and use them craftily. But for that, you first need to know the basics of it. So, today we will tell you how to use Scribe to make detailed step-by-step guides on your Mac.

Let’s get started!

Get started with Scribe: How to Crop Screenshots on Mac

         
  • Once you've downloaded the application, locate the Scribe icon in your top menu bar.
  • Click on it to get a drop-down option. Click “Start Recording” from there. 
  • Next is the easiest step — go about the process you want to record. Don’t worry if you make a mistake. You can always edit it later. 
  • Once you finish the process, click the “Stop” button, and you are done! You will find the “Stop Recording” option in the same place as the “Start Recording” option.
  • Once you're done with the recording, the software will create your how-to guide in your browser for you to edit it further and share it.  
  • And just like that, you have created yourself a new Scribe! Congratulations!

You can use Scribe as a desktop app (Pro) or Edge and Chrome screen capture extension. Here are the steps to make sure you have easy access to the extension:

  • Open your browser. We will take Chrome as an example here.
  • Next to your profile, you will find a puzzle icon. Click on it to find a dropdown menu.
  • From the menu, locate Scribe and click on the Pin icon. You have now successfully pinned the Scribe extension!
  • Next, you can click on the Scribe extension and start recording. Once you are done, click on “Stop Recording”, and you are done. It’s as easy as that! 

{{banner-default="/banner-ads"}}

Use Scribe Pages to take your screenshots to the next level

You might be thinking, Scribe sounds great, but:

  • “What if my process is multiple steps? Can I combine Scribes?” 
  • Can I send someone a collection of Scribes?” 
  • Can I add videos and links?” 

That's why we created Pages, visual documents that give you the flexibility to make process guides your own. Now you have even more options to capture, organize and share Scribes. With Pages comes the freedom to add:

  • Text and descriptions.
  • Multiple Scribes.
  • Hyperlinks.
  • Loom, Gong and Youtube videos

Here's a Page in action.

Getting started with Slack: How to Crop Screenshots on Mac


‎Get started with Scribe today

Scribe truly has the potential to achieve as much as its user can deem possible. So, it is up to you to use it best!

Here's what TikToker Conor Butkovik had to say about it:

‎So, what are you waiting for? Try Scribe for yourself today, and never go back to manual documentation again!

Ready to try Scribe?

Scribe automatically generates how-to guides and serves them to your team when they need them most. Save time, stay focused, help others.